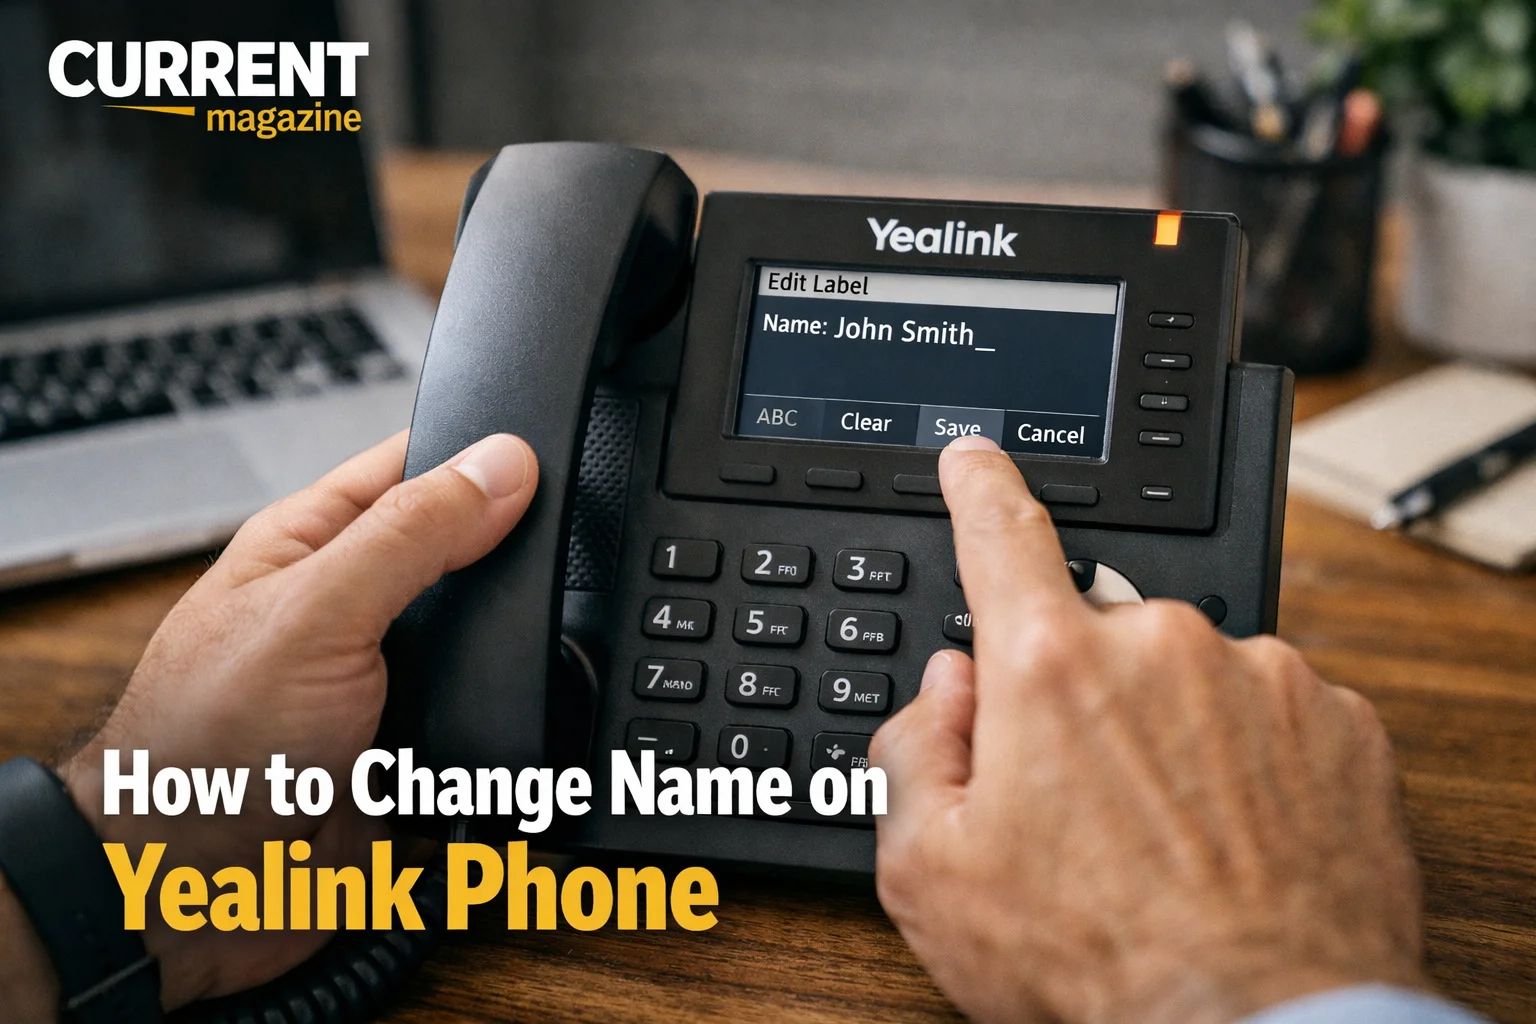
If you’re wondering how to change name on Yealink phone, you’re not alone. Whether you need to update your display name, change the caller ID information, or customize the phone’s label for easier identification in your office, changing the name on your Yealink phone is a common task that’s easier than you might think. Yealink phones are popular business VoIP phones known for their reliability, but navigating the settings can be confusing if you’ve never done it before. In this comprehensive guide, I’ll walk you through multiple methods to change different types of names on your Yealink phone, from display names to account labels.
Understanding Different “Names” on Yealink Phones
Before we dive into the how-to steps, it’s important to understand that there are several different “names” you might want to change on a Yealink phone:
Display name: This is what appears on your phone’s screen and what other people see when you call them (your caller ID). It’s tied to your SIP account settings.
Phone label: This is the name shown on the phone itself for identification purposes, useful in offices with multiple phones.
Account label: If your phone has multiple lines or accounts configured, each can have its own label for easy identification.
Contact names: Names saved in your phone’s directory or phonebook.
Extension label: The name associated with your extension number in the phone system.
Each of these requires a different method to change, so identify which name you actually need to change before proceeding.
Method 1: Changing Display Name Through Phone Settings
This is the most common change people need—updating what others see when you call them. Here’s how to do it directly on your Yealink phone.
For most Yealink models (T40, T42, T46, T48, T53, T54, T57, etc.):
Step 1: Press the “Menu” button on your phone. This is usually a soft key at the bottom of the screen or a dedicated button with three horizontal lines.
Step 2: Navigate to “Settings” using the navigation keys (arrow buttons). Press “OK” or “Enter” to select.
Step 3: Select “Advanced Settings” or “Advanced.” You may need to enter a password. The default admin password is usually “admin” (all lowercase).
Step 4: Navigate to “Accounts” and press “OK.”
Step 5: Select the account line you want to change (usually “Account 1” if you only have one line).
Step 6: Scroll down to find “Display Name” or “User Display Name.”
Step 7: Press “Edit” or the soft key to modify the field.
Step 8: Delete the current name using the backspace key (usually the dial pad’s * or # key, depending on your model).
Step 9: Enter your new display name using the dial pad. Press keys multiple times to cycle through letters (like old phone texting—press 2 once for “A,” twice for “B,” etc.).
Step 10: Press “OK” or “Confirm” to save the change.
Step 11: The phone may ask you to reboot or it will apply changes automatically.
Your new display name should now appear on your phone’s screen and when you make outbound calls.
Method 2: Changing Name Through Web Interface
The web interface is often easier than using the phone’s buttons, especially if you need to type a lot. Here’s how to access and change names through the web interface.
Step 1 – Find your phone’s IP address:
On your Yealink phone, press the “OK” button or “Status” button. Look for “IP Address” or navigate to Menu > Status > Network > IP Address. Write down this IP address (it looks like 192.168.1.100 or similar).
Step 2 – Access the web interface:
On a computer connected to the same network, open any web browser (Chrome, Firefox, Edge, Safari). Type the IP address into the address bar and press Enter. You’ll see the Yealink phone’s login page.
Step 3 – Log in:
The default username is usually “admin” and the default password is “admin” (both lowercase). If these don’t work, check with your IT department—they may have changed the credentials.
Step 4 – Navigate to account settings:
Click on “Account” in the top menu. Select the account line you want to modify (usually “Account 1”).
Step 5 – Change the display name:
Find the “Display Name” field in the Basic Settings section. Click in the field and type your new name (much easier than using the phone’s keypad!). You can use uppercase, lowercase, spaces, and most special characters.
Step 6 – Save changes:
Scroll to the bottom and click “Confirm” or “Submit.” The phone will usually reboot automatically to apply changes. If not, you may need to click “Reboot” in the top menu.
This method is much faster and easier, especially for longer names or when configuring multiple phones.
Method 3: Changing Name Through Phone System Admin Portal
In many business environments, your display name is controlled by your phone system (PBX) administrator, not the phone itself. If methods 1 and 2 don’t work or the name keeps reverting, the change needs to be made in the phone system.
For hosted VoIP systems (like RingCentral, 8×8, Vonage):
Log into your company’s phone system portal (your IT department should provide login credentials). Navigate to “Users,” “Extensions,” or “Accounts.” Find your extension or username. Look for fields like “Caller ID Name,” “Display Name,” or “Outbound Caller ID.” Update the name and save changes. The phone will update automatically within a few minutes.
For on-premise PBX systems (like FreePBX, 3CX, Asterisk):
Your system administrator will need to make this change. Contact your IT department and request a display name change. They’ll update it in the PBX configuration. Changes usually take effect immediately or after the phone registers again.
Why this matters: If your phone system controls the display name, any changes you make directly on the phone will be overwritten when the phone re-registers with the server. This is the most common reason why name changes don’t “stick.”
Method 4: Changing Phone Label (Device Name)
If you want to change the label that identifies the physical phone itself (not the caller ID), follow these steps:
Through phone settings:
Press “Menu” and navigate to “Settings” > “Basic Settings” or “Phone Settings.” Look for “Phone Label” or “Device Name.” Edit the field and enter your desired label (like “Reception Desk” or “Conference Room 1”). Save the changes.
Through web interface:
Log into the web interface (see Method 2 for how). Click “Phone” in the top menu. Find “Phone Label” or “Device Name.” Enter your new label. Click “Confirm” and reboot if necessary.
This label helps identify the phone in network scans and in your IT department’s phone inventory but doesn’t affect caller ID or what others see.
Changing Contact Names in Phone Directory
If you want to change how a contact’s name appears in your phone’s directory, the process is different:
Editing existing contacts:
Press the “Directory” or “Contacts” button (phone book icon). Navigate to the contact you want to edit using the arrow keys. Press the “Option” soft key or press “OK.” Select “Edit” or “Modify.” Use the dial pad to change the name. Save the changes by pressing “OK” or “Save.”
Adding new contacts:
Press the “Directory” or “Contacts” button. Press “Add” or the soft key for adding new contacts. Enter the contact name using the dial pad. Enter the phone number. Select the storage location (Phone or Server). Save the contact.
Contact names are stored locally on the phone unless you’re using a directory server, so these changes only affect your specific phone.
Common Problems and Solutions
Even when following the steps correctly, you might encounter issues. Here’s how to solve them:
Problem: Name keeps reverting to the old one
Solution: This almost always means your phone system (PBX) is controlling the display name. The phone downloads configuration from the server and overwrites your manual changes. Contact your IT department to change the name in the phone system instead.
Problem: Can’t access advanced settings—password doesn’t work
Solution: Try these default passwords: “admin,” “0000,” “1234,” or blank (just press OK). If none work, your IT department changed it for security. Ask them for the admin password or have them make the change for you.
Problem: Display name appears on phone but not on outbound calls
Solution: This is a carrier or trunk configuration issue. Your SIP trunk provider controls the outbound caller ID. Log into your SIP trunk provider’s portal and update the caller ID there, or contact your VoIP provider’s support.
Problem: Special characters don’t appear correctly
Solution: Some phone systems and carriers don’t support special characters in display names. Stick to letters, numbers, spaces, and basic punctuation. Avoid symbols like @, #, $, etc.
Problem: Name is too long and gets cut off
Solution: Most systems support 15-30 characters in display names. Keep names concise. Use abbreviations if necessary (like “Dr.” instead of “Doctor”).
Problem: Changes don’t save after reboot
Solution: This indicates the phone is receiving configuration from a provisioning server. Changes must be made in the provisioning template or phone system configuration, not directly on the phone.
Different Yealink Models and Their Interfaces
Yealink has many phone models, and the interface varies slightly. Here’s a quick reference:
T19/T21/T23 (Basic models):
Very simple interface with basic menus. Limited customization options. Name changes must often be done through web interface or provisioning.
T40/T42/T46/T48 (Mid-range models):
Full-featured interface with easy menu navigation. Support all the methods described in this guide. Color screens on T46/T48 make navigation easier.
T53/T54/T57/T58 (High-end models):
Android-based interface with touchscreen (except T53/T54). More intuitive navigation. Easier text entry with virtual keyboards on touchscreen models.
W52/W56/W60 (DECT wireless models):
Similar interface to T-series. Name changes work the same way. Web interface is often the easiest method.
CP series (Conference phones):
Simplified interface focused on conferencing features. Name changes typically done through web interface.
The basic principles are the same across all models, but button locations and exact menu names may vary slightly.
Tips for Typing Names Using Phone Keypad
If you’re entering names directly on the phone without a touchscreen, here are some tips:
Understanding multi-tap entry:
Yealink phones typically use multi-tap entry like old mobile phones. Press number keys multiple times to cycle through letters. For example, on key 2: press once = A, twice = B, three times = C, four times = 2.
Quick reference for dial pad letters:
2 = ABC2, 3 = DEF3, 4 = GHI4, 5 = JKL5, 6 = MNO6, 7 = PQRS7, 8 = TUV8, 9 = WXYZ9, 0 = space or 0, 1 = special characters and punctuation, * = usually toggles between uppercase, lowercase, and numeric, # = usually backspace or delete.
Time-saving tricks:
Wait a moment after entering a letter before entering the next letter on the same key. Press the right arrow key to move to the next character space without waiting. Use the web interface instead if you’re entering long names or multiple names—it’s much faster!
Security Considerations
When changing names on business phones, keep security in mind:
Password protection:
Always change the default admin password (“admin”) to something secure. If you don’t, anyone on your network can access and modify phone settings.
Provisioning security:
If phones auto-provision from a server, ensure the provisioning server URL uses HTTPS, not HTTP. This prevents someone from intercepting and modifying phone configurations.
Appropriate naming:
In business environments, use professional display names. Avoid nicknames, jokes, or anything that might be inappropriate when calling customers. Consider including title or department for clarity (e.g., “John Smith – Sales”).
Authorization:
In larger organizations, ensure you have permission to change phone settings. Some companies have policies requiring IT approval for configuration changes.
Bulk Changes for Multiple Phones
If you need to change names on many Yealink phones, doing each one individually is tedious. Here are better options:
Using provisioning server:
Set up a provisioning server (like Yealink’s RPS, 3CX, FreePBX, or a custom TFTP server). Create configuration templates with the correct display names for each phone. Point phones to the provisioning server. Phones automatically download and apply configurations.
Advantages: Changes apply automatically to all phones. Easy to maintain and update. Phones always stay configured correctly. Supports hundreds or thousands of phones.
Using CSV import (for contacts):
For adding the same contacts to multiple phones, create a CSV file with contact information. Upload the CSV through the web interface of each phone (or push via provisioning). Contacts import automatically.
Mass configuration tools:
Yealink offers device management tools (YMS – Yealink Management Server). These allow bulk configuration of multiple phones from a central interface. IT departments often use these for managing phone fleets.
When to Contact IT Support
Sometimes you shouldn’t change the name yourself. Contact your IT department if:
Your company has strict phone system policies. You don’t have the admin password and can’t get it. Changes you make keep getting overwritten. The phone is part of a managed service and changes could void support. You’re unsure what display name is appropriate for your role. Multiple people use the same phone and need different caller IDs depending on who’s calling.
IT departments often have specific reasons for their phone naming conventions, especially in call centers or regulated industries.
Verifying Your Name Change Worked
After making changes, test to confirm they worked:
Check the phone display:
Look at the idle screen—your new name should appear. Press the line key—the name should show there too.
Make a test call:
Call your personal cell phone or a colleague’s phone. Ask them what name appears on their caller ID. If it still shows the old name, the issue is with the phone system or carrier, not the phone itself.
Check web interface:
Log into the web interface and verify the display name field shows your new name. This confirms the phone saved your changes.
Wait for reregistration:
Sometimes changes take a few minutes to propagate through the phone system. Wait 5-10 minutes and test again.
If the name doesn’t change after following all steps, it’s definitely controlled at the phone system level, and you’ll need administrator help.
10 Frequently Asked Questions
- Why does my name keep changing back after I update it on my Yealink phone?
This happens when your phone receives configuration from a phone system or provisioning server that overwrites your manual changes. The name must be changed in the phone system’s admin portal, not directly on the phone. - What’s the default admin password for Yealink phones?
The default admin username is “admin” and the default password is “admin” (both lowercase). Some newer models use “admin” for username and leave the password blank initially. If these don’t work, your IT department likely changed it. - Can I change the caller ID name that shows up on other people’s phones?
Partially. You can change the display name sent from your phone, but your phone carrier and the receiving phone company ultimately control what appears. Some carriers override your display name with their own database information. - How do I type letters on my Yealink phone without a touchscreen?
Use multi-tap entry: press number keys multiple times to cycle through letters (like old cell phones). For example, press 2 three times for “C.” Using the web interface is much easier for entering text. - Do I need to restart my Yealink phone after changing the display name?
Usually yes, but not always. Some phones apply changes immediately, while others require a reboot. If you don’t see changes after saving, manually reboot the phone by unplugging it or using Menu > Reboot. - Can I have different names for different phone lines on the same phone?
Yes! If your Yealink phone has multiple accounts/lines configured, you can set a different display name for each account. Just change the display name for each account separately in the settings. - Why can’t I access the advanced settings on my work phone?
Your IT department likely locked advanced settings for security reasons or to prevent accidental misconfigurations. This is common in corporate environments. Contact IT support to request changes. - Will changing my display name affect my voicemail or other features?
No, changing the display name only affects what appears on screens and caller ID. It doesn’t impact voicemail, call forwarding, speed dials, or other phone features. Your extension number stays the same. - How long can my display name be on a Yealink phone?
Most Yealink phones and phone systems support display names up to 30-40 characters, though practical limits are usually 15-25 characters to prevent truncation on smaller displays. Keep names concise for best results. - Can I use emojis or special characters in my display name?
Generally no. Yealink phones and most phone systems only support standard ASCII characters (letters, numbers, basic punctuation). Special characters, emojis, and extended Unicode characters usually won’t display correctly or will be rejected.