How to Make a Warm Compress for Pain Relief at Home
Simple Steps to Make a Warm Compress for Comfort
Learn how to make a warm compress using simple household items. This guide shows you multiple ways to create a warm compress for sore muscles, headaches, and pain relief. Discover the best materials, temperature tips, and how long to apply heat for maximum comfort.
What Is a Warm Compress?
A warm compress is a soft bundle of material heated to a comfortable temperature and applied to your skin. It delivers soothing heat to reduce pain, ease tension, and promote healing.
Warm compresses are different from heating pads. A heating pad is electric. A warm compress is something you make by hand using heat and soft materials. Both provide similar benefits, but warm compresses are portable, inexpensive, and easy to make at home.
Heat therapy has been used for centuries to ease pain and discomfort. It’s safe, natural, and works well for many common problems.
Why Heat Helps with Pain and Tension
Heat has powerful healing properties:
Increases Blood Flow Warmth causes blood vessels to expand. More blood flows to the area, bringing oxygen and nutrients that help healing.
Relaxes Muscles Heat loosens tight, tense muscles. This reduces muscle spasms and stiffness.
Reduces Pain Signals Heat stimulates nerve endings that block pain signals from reaching your brain. This is called the “gate control theory” of pain.
Improves Flexibility Warm muscles and joints move more easily. Heat makes stretching and movement less painful.
Reduces Inflammation While ice reduces acute inflammation, heat helps chronic inflammation by improving circulation.
Promotes Healing Better blood flow brings healing nutrients to injured areas.
Common Uses for Warm Compresses
Muscle Pain and Soreness Heat eases sore muscles from exercise, repetitive work, or sleeping wrong.
Back Pain Lower back pain often responds well to heat. Apply a warm compress to the sore area for 15-20 minutes.
Neck and Shoulder Tension Heat relieves tight neck and shoulder muscles from stress or poor posture.
Headaches Some headaches improve with heat applied to the neck or forehead. (Migraines respond better to ice.)
Menstrual Cramps Heat applied to your lower abdomen eases period pain effectively.
Joint Stiffness Arthritis pain and joint stiffness improve with gentle heat.
Ear Pain A warm compress placed near (not in) the ear helps ear infections and earaches.
Sinus Pain Heat over your sinuses helps congestion and sinus headaches.
Boils or Cysts Heat helps bring boils and cysts to a head so they drain. (Ask a doctor before treating serious infections.)
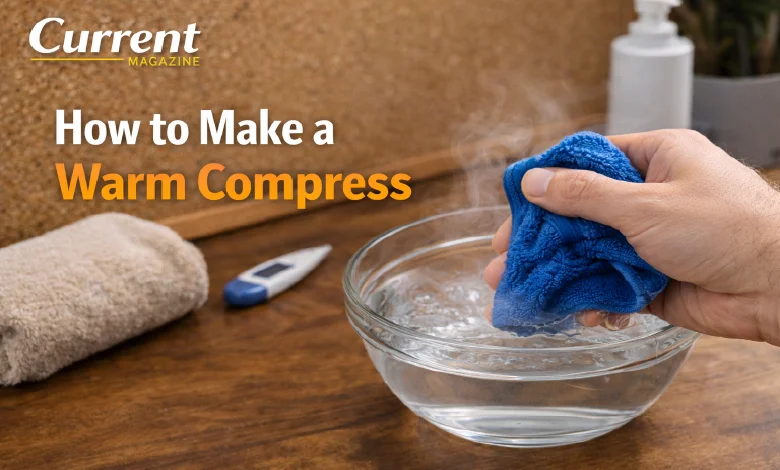
Method 1: The Wet Washcloth Compress
This is the simplest method and takes just minutes.
What You Need:
- A clean washcloth or towel
- Warm water
- A bowl or sink
Steps:
- Fill a bowl with warm water. The water should be warm but not so hot it burns your skin. Test the temperature with your inner wrist or elbow first. It should feel comfortable, about 110-115°F (43-46°C).
- Soak the washcloth. Dip your clean washcloth in the warm water until it’s saturated.
- Wring out excess water. Squeeze gently so the cloth is wet but not dripping. You don’t want water running down your body.
- Apply to the affected area. Place the warm washcloth directly on the sore spot. If it’s too hot, let it cool a few seconds first.
- Keep it in place. You can hold it with your hand or lie on top of it to keep it warm.
- Reheat as needed. As the cloth cools, dip it back in warm water and reapply. Most people use a compress for 15-20 minutes.
Advantages:
- Super simple
- Takes only minutes to prepare
- Uses items you already have
- Can easily reheat
Disadvantages:
- Cools down quickly
- Might drip water
- Not portable
Method 2: The Heating Pad Alternative (No Electricity)
This method keeps heat longer than a wet washcloth.
What You Need:
- A cloth bag or pillowcase
- Dry rice, beans, or lentils
- A rubber band or string
- Warm water (optional)
Steps:
- Fill a bag with rice. Pour uncooked rice into a cloth bag or pillowcase. Fill it about 3/4 full so it’s flexible.
- Seal the bag. Tie the opening with a rubber band or string. Make sure it’s secure so rice doesn’t leak out.
- Heat the rice bag. You have two options:
- Microwave method: Place the rice bag in the microwave for 1-2 minutes. Start with 1 minute and check. Different microwaves vary in power. Test the temperature before applying to skin.
- Stovetop method: Fill a pot with water and bring to a simmer. Place the sealed rice bag in the water for 3-5 minutes. Remove with tongs and let cool slightly.
- Test the temperature. Always test on your inner wrist before applying to sensitive areas. It should be warm, not painfully hot.
- Apply to your body. Place the warm rice bag on the sore area. You can wrap a towel around it if it’s too hot.
- Keep it in place. The rice bag holds heat for 20-30 minutes. You can reheat it as many times as needed.
Advantages:
- Holds heat much longer than wet cloths
- Reusable (just reheat)
- Inexpensive
- Moldable to fit your body
- Can store and reuse many times
Disadvantages:
- Takes a minute to heat
- Slightly more effort to prepare
- Rice can dry out over time (still works, but lasts slightly less long)
Safety tip: Never microwave a rice bag for more than 3 minutes. It can dry out too much or overheat.
Method 3: The Bottle Compress
This method is great for precise application.
What You Need:
- A water bottle (plastic or glass)
- Warm water
- Towel (optional)
Steps:
- Fill a bottle with warm water. Use warm tap water, not boiling. Test temperature first.
- Seal the bottle. Screw the cap on tightly so it doesn’t leak.
- Wrap if needed. If the bottle is too hot, wrap it in a thin towel before applying to skin.
- Apply to the sore area. Roll the bottle back and forth over sore muscles or hold it in place for stationary pain.
- Reheat when cool. Run the bottle under warm tap water to reheat it. You can do this multiple times.
Advantages:
- Perfect for rolling massage
- Can use boiling water (in a bottle, not touching skin)
- Holds heat well
- Portable
- Inexpensive
Disadvantages:
- Risk of burns if too hot
- Needs to be sealed carefully to prevent leaks
- Less flexible than other options
Method 4: The Wet Towel Roll
This method is great for larger areas like your back.
What You Need:
- A large, clean towel
- Warm water
- A bowl or tub
- Plastic bag (optional)
Steps:
- Soak the towel. Dip a large, clean towel in warm water. Make sure it’s completely saturated.
- Wring out excess water. Squeeze gently. You want it wet but not dripping.
- Roll the towel. Roll it tightly into a long cylinder shape.
- Wrap for dryness (optional). If you don’t want it dripping on your clothes, wrap the towel roll in a plastic bag.
- Apply to your body. Place the warm towel roll along your back, neck, or other area. You can lie on it for weight and warmth.
- Reheat as needed. Unwrap, dip in warm water again, and reapply.
Advantages:
- Covers large areas
- Great for back pain
- Comfortable to lie on
- Simple to prepare
Disadvantages:
- Cools quickly
- Heavy when wet
- Might feel heavy on sore areas
Method 5: The Herbal Compress (Luxe Option)
For a spa-like experience, add herbs to your compress.
What You Need:
- A clean cloth bag or cheesecloth
- Dry herbs (chamomile, lavender, eucalyptus, or ginger)
- Warm water
- A bowl
Steps:
- Fill the bag with herbs. Place dried herbs in a cloth bag or cheesecloth bundle.
- Tie the bag. Secure the herbs inside so they don’t escape into water.
- Soak in warm water. Dip the herbal bag and cloth together in warm water for 2-3 minutes. The herbs will infuse the compress.
- Apply to skin. Gently squeeze excess water and apply the warm herbal compress.
- Enjoy the aromatherapy. Different herbs provide different benefits:
- Lavender: Calming and soothing
- Chamomile: Gentle and relaxing
- Eucalyptus: Helps clear sinuses
- Ginger: Anti-inflammatory
- Peppermint: Cooling (good for some headaches)
Advantages:
- More luxurious
- Aromatherapy benefits
- Can reduce inflammation naturally
- Pleasant scent
Disadvantages:
- Takes more preparation
- Herbs can be messy
- Not necessary for pain relief (plain heat works fine)
Safe Temperature Guidelines
Getting the right temperature is crucial. Too hot can burn; too cool won’t help.
Safe Temperature:
- 110-115°F (43-46°C) is ideal
- Should feel warm and comfortable
- You shouldn’t wince or pull away
How to Test:
- Use your inner wrist (most sensitive skin)
- Place compress there for a few seconds
- If it’s too hot, wait a minute and test again
- Never apply something you can’t comfortably hold
Signs It’s Too Hot:
- You pull away immediately
- Your skin turns red
- You feel pain instead of comfort
Important: People with reduced sensation (diabetes, nerve damage, numbness) should be extra careful. Have someone else test the temperature. You might not feel when something is too hot.
How Long Should You Use a Warm Compress?
Standard duration:
- 15-20 minutes is typical
- This is long enough for benefits without overdoing it
You can:
- Apply for 20 minutes, then remove for 20 minutes
- Reapply multiple times daily
- Use for up to 30 minutes on large areas like your back
Don’t:
- Apply for more than 30 minutes continuously (risk of burns)
- Use on the same area more than 3-4 times daily (unless directed by a doctor)
- Use overnight while sleeping (you might overheat or get burned)
Listen to your body: If the area feels too warm or uncomfortable, remove the compress and let skin cool.
When NOT to Use Heat
Heat isn’t right for every injury. Know when to use ice instead.
Don’t use heat for:
- Acute injuries (first 24-48 hours) – use ice instead
- Swelling that just started – ice reduces swelling; heat increases it
- Fever – additional heat isn’t helpful
- Severe burns or open wounds
- Areas with poor circulation
- Skin conditions like eczema or psoriasis (in flare-ups)
- Right after an injury that’s still hot or throbbing
Use ice first, then heat: For many injuries, apply ice for the first 1-2 days, then switch to heat. Ask your doctor if unsure.
Medical Conditions That Benefit from Heat
Chronic pain: Long-term pain from arthritis or old injuries responds well to heat.
Muscle tension: Tight muscles from stress, work, or exercise benefit from heat.
Joint stiffness: Warm joints move more easily.
Menstrual cramps: Heat is very effective for period pain.
Sinus congestion: Heat helps drainage and pain.
Ear infections: Warm compress near the ear eases discomfort.
Boils: Heat can help bring a boil to a point where it drains (but see a doctor first for serious infections).
Combining Heat with Other Treatments
Heat works best as part of a complete plan:
Heat + Rest = Better healing Rest sore muscles while applying heat.
Heat + Stretching = Improved flexibility Warm muscles stretch more easily. Gently stretch after heat application.
Heat + Massage = Extra relief Use a warm compress to heat the area, then massage gently.
Heat + Medication = Faster pain relief Taking pain relief medicine and using heat together often works better than either alone.
Heat + Ice = Complete therapy Apply ice for acute pain, then heat for chronic pain. Never apply both simultaneously.
Tips for Maximum Comfort
Make it cozy: Use clean, soft materials that feel nice against skin.
Find the right temperature: Warm, not hot. You should feel relaxed, not uncomfortable.
Add comfort items: Play soft music, read, or relax while using your compress.
Use good positioning: Lie or sit in a comfortable position that supports the sore area.
Stay hydrated: Drink water while using heat. Heat can cause slight dehydration.
Don’t rush: Use heat as an opportunity to rest and relax. Stress relief adds to pain relief benefits.
Storage and Reuse
Wet washcloths:
- Hang to dry after use
- Wash regularly with other laundry
- Reuse many times
Rice bags:
- Store in a cool, dry place
- They last for years if sealed properly
- If rice gets moldy, replace with fresh rice
- Can double-bag for extra durability
Bottles:
- Dry completely after use
- Store upside down to prevent mold
- Reuse indefinitely
Herbal bags:
- Dry completely before storing
- Store herbs in airtight containers
- Replace herbs yearly for best results
10 FAQs About Warm Compresses
- How quickly does a warm compress work?
You usually feel relief within 5-10 minutes. Maximum benefit happens around 15-20 minutes of use. Some people feel improvement almost immediately, especially with muscle tension. Pain relief can last several hours after you remove the compress. - Can you use a warm compress on your face?
Yes, but gently. The face has sensitive skin. Use a lower temperature than you’d use on your back. A warm (not hot) damp cloth works well for sinus pain, headaches, and facial tension. Never apply directly to eyes. - Is a warm compress safe during pregnancy?
Generally yes, but ask your doctor first. Heat on your lower abdomen during early pregnancy is sometimes discouraged. Heat on your lower back for back pain is usually fine. Always get approval from your healthcare provider. - Can you use a warm compress on wounds?
Not on open wounds. You can use warm compresses on closed wounds that are healing, but never on cuts, scrapes, or open sores. Heat can increase infection risk. Wait until wounds are closed or ask a doctor. - What’s the difference between wet and dry heat?
Wet heat (damp cloth) penetrates skin faster and feels more intense. Dry heat (rice bag) is gentler and lasts longer. Both are effective. Choose based on preference and what you have available. Wet heat is great for quick relief; dry heat is better for extended use. - Can heat make some pain worse?
Yes. Heat can increase pain for acute injuries (first 24-48 hours), inflammation, or certain conditions. If pain gets worse with heat, stop and try ice instead. Also, some conditions like migraines feel worse with heat—use ice instead. - How often can you use a warm compress daily?
You can use heat 3-4 times daily if needed. Each session should be 15-20 minutes. Leave at least 20 minutes between applications to let skin cool. If pain is severe, ask a doctor about the best frequency. - Can children use warm compresses?
Yes, but with precautions. Never use extremely hot temperatures. Supervise children to prevent burns. Older children (7+) can use warm compresses safely with supervision. For young children, use lower temperatures or supervise directly. - Is it safe to sleep with a warm compress?
Generally no. Don’t leave a warm compress on while sleeping. You might not notice if it’s getting too hot, which increases burn risk. You could also overheat your body. Use compresses while awake, then remove before sleep. - What should you do if a warm compress burns your skin?
Remove the compress immediately. Run cool (not cold) water over the burn for 5-10 minutes. Don’t apply ice. If the burn is severe (blistering, severe redness), see a doctor. For minor burns, use aloe vera gel and avoid heat for a few days.
Final Thoughts
A warm compress is one of the simplest and most effective home remedies for pain relief. Whether you use a wet washcloth, rice bag, or water bottle, the benefits are real and immediate.
The best part? You probably already have everything you need at home. No expensive equipment. No electricity required. Just warm water, a soft material, and 15-20 minutes of your time.
Remember to test temperature before applying, never use heat on acute injuries, and listen to your body. If pain doesn’t improve after a few days of heat therapy, see a doctor to rule out serious conditions.