How to Dermaplane at Home: Simple Steps for Beginners | Your Guide
How to Dermaplane at Home: Simple Steps
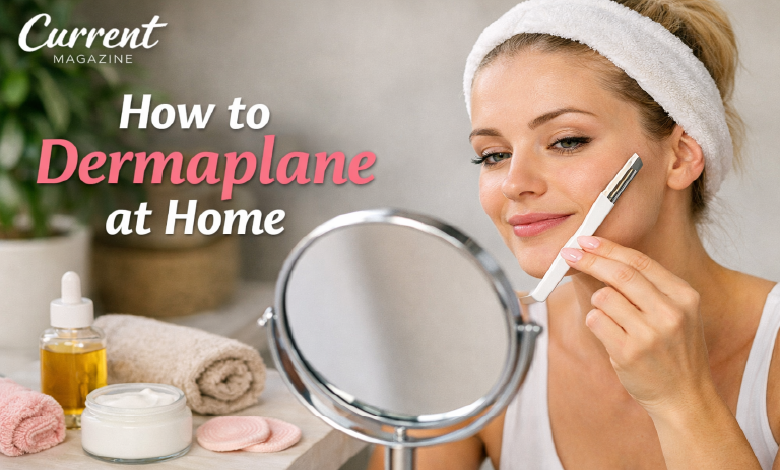
Dermaplaning is a simple exfoliation technique that removes dead skin cells and peach fuzz from your face using a small, sterile blade. This popular skincare treatment leaves your skin incredibly smooth, helps makeup apply flawlessly, and gives you an instant glow. Whether you’re curious about trying dermaplaning for the first time or want to perfect your technique, this guide will walk you through everything you need to know to safely how to dermaplane at home.
What is Dermaplaning?
Dermaplaning is a physical exfoliation method that uses a surgical scalpel or dermaplaning tool to gently scrape off the top layer of dead skin and fine facial hair (vellus hair). Unlike shaving, dermaplaning is performed at a 45-degree angle and removes buildup that can make your complexion look dull.
The treatment has been used by estheticians for years, but now many people successfully dermaplane at home with the right tools and technique.
Benefits of Dermaplaning
Before we dive into the how-to, let’s look at why dermaplaning has become so popular:
Smoother skin texture – Removing dead skin cells reveals the fresh, healthy skin underneath, making your face feel incredibly soft.
Better product absorption – Without the barrier of dead skin, your serums and moisturizers can penetrate more deeply and work more effectively.
Flawless makeup application – Foundation and other makeup products glide on smoothly without catching on peach fuzz or dry patches.
Brighter complexion – Dermaplaning gives you an instant glow by removing the dull, damaged top layer of skin.
Reduced appearance of fine lines – By stimulating cell turnover, dermaplaning can make fine lines and wrinkles less noticeable over time.
No downtime – Unlike chemical peels or laser treatments, you can dermaplane and immediately go about your day.
What You’ll Need
Gathering the right supplies is the first step to successful dermaplaning:
- Dermaplaning tool or scalpel – You can buy single-blade razors designed specifically for dermaplaning, or use a sterile surgical scalpel (usually #10 blade)
- Cleansing oil or gentle cleanser – To thoroughly clean your face before starting
- Cotton pads or clean towel – For drying your skin
- Hydrating serum – To apply immediately after dermaplaning
- Moisturizer with SPF – Essential for protecting your newly exposed skin
- Good lighting – A well-lit bathroom or magnifying mirror helps you see what you’re doing
Step-by-Step Guide: How to Dermaplane
Step 1: Start with Clean, Dry Skin
Wash your face thoroughly with a gentle cleanser to remove all makeup, oil, and dirt. This is crucial because dermaplaning on dirty skin can push bacteria deeper into your pores and cause breakouts.
Pat your face completely dry with a clean towel. Dermaplaning must be done on dry skin – never attempt it on wet or damp skin, as the blade won’t glide properly and you won’t get good results.
Step 2: Prep Your Workspace
Make sure you’re in a well-lit area where you can see your face clearly. Sit or stand comfortably in front of a mirror. Have all your supplies within easy reach.
Wash your hands thoroughly and make sure your dermaplaning tool is clean and sterile.
Step 3: Pull Your Skin Taut
This is one of the most important parts of proper dermaplaning technique. Use your free hand to stretch the area you’re working on, creating a flat, smooth surface. This helps prevent nicks and allows the blade to glide smoothly.
Step 4: Hold the Blade at a 45-Degree Angle
Hold your dermaplaning tool at a 45-degree angle against your skin. This angle is key – too flat and you won’t remove anything, too steep and you risk cutting yourself.
Step 5: Make Short, Gentle Strokes
Using light pressure, make short downward strokes in the direction of hair growth. Start at your forehead and work your way down your face. The strokes should be about 2-3 inches long.
Never drag the blade across your skin or apply too much pressure. Let the blade do the work – you should barely feel it touching your skin.
Step 6: Work in Sections
Divide your face into sections and complete one area at a time:
- Forehead – Start from your hairline and work down toward your eyebrows
- Cheeks – Begin near your ear and stroke toward your nose
- Chin and jawline – Work from the center outward
- Upper lip – Stretch the skin and use short, careful strokes
- Nose – Carefully dermaplane the sides of your nose if needed
Step 7: Avoid Sensitive Areas
Do not dermaplane over:
- Active acne or inflamed pimples
- Open cuts or wounds
- Moles or raised skin tags
- Sunburned skin
- Areas with eczema or rosacea flare-ups
You can carefully work around these areas, but never drag the blade directly over them.
Step 8: Rinse and Moisturize
Once you’ve finished dermaplaning, rinse your face with cool water to remove any remaining dead skin cells. Your skin might look slightly pink, which is completely normal.
Immediately apply a hydrating serum followed by a gentle moisturizer. Your skin will absorb products much better right after dermaplaning, so this is the perfect time to use your favorite treatments.
Step 9: Apply Sunscreen
This step is non-negotiable. Your newly exposed skin will be more sensitive to the sun, so apply a broad-spectrum SPF 30 or higher, even if you’re staying indoors. UV damage on freshly dermaplaned skin can lead to hyperpigmentation.
How Often Should You Dermaplane?
Most people should dermaplane once every 3-4 weeks. This timing aligns with your skin’s natural cell turnover cycle, which is about 28 days.
Dermaplaning more frequently can irritate your skin and disrupt its natural barrier function. If you have very sensitive skin, you might want to wait 5-6 weeks between sessions.
Aftercare Tips
The 24-48 hours after dermaplaning are important for protecting your fresh skin:
- Avoid harsh products – Skip retinol, AHAs, BHAs, and other strong actives for 2-3 days
- Don’t work out immediately – Wait at least 24 hours before doing intense exercise that causes sweating
- Stay out of the sun – Avoid direct sun exposure and always wear SPF
- Keep it simple – Stick to gentle, hydrating products for the first few days
- Don’t touch your face – Keep your hands off to avoid introducing bacteria
Common Mistakes to Avoid
Using a dull blade – Always use a fresh, sharp blade. Dull blades tug at your skin and can cause irritation.
Dermaplaning wet skin – This is ineffective and can lead to uneven results.
Applying too much pressure – Let the blade glide gently across your skin. You’re not trying to scrape hard.
Going against the hair growth – Always stroke in the direction of hair growth to prevent irritation.
Dermaplaning too often – Over-exfoliating damages your skin barrier and causes sensitivity.
Skipping sunscreen – This can lead to sun damage and dark spots on your newly exposed skin.
Who Shouldn’t Dermaplane?
While dermaplaning is safe for most people, you should avoid it if you have:
- Active acne or cystic breakouts
- Extremely sensitive skin conditions like severe rosacea
- Inflamed or irritated skin
- Very deep wrinkles (consult a professional)
- Skin infections or open wounds
If you’re unsure whether dermaplaning is right for you, consult with a dermatologist or licensed esthetician.
At-Home vs. Professional Dermaplaning
Professional dermaplaning performed by an esthetician uses medical-grade tools and can address your entire face more thoroughly. However, at-home dermaplaning can deliver excellent results when done correctly and is much more affordable.
If you’re nervous about trying it yourself, consider getting it done professionally first so you can see the technique and results before attempting it at home.
Final Thoughts
Dermaplaning is one of the simplest and most effective ways to achieve smoother, brighter skin at home. With the right technique and tools, you can safely perform this treatment and enjoy professional-quality results. Remember to always use a fresh blade, work on clean dry skin, and protect your face with sunscreen afterward.
Start slowly, be gentle with your skin, and you’ll soon master this game-changing skincare technique!
10 Frequently Asked Questions About Dermaplaning
- Will dermaplaning make my facial hair grow back thicker or darker?
No, this is a myth. Dermaplaning removes vellus hair (peach fuzz), which is fine and light. It will grow back at the same texture and color as before. The hair might feel slightly stubbly as it grows back because it has a blunt edge from being cut, but it won’t be thicker or darker. - How long does it take to dermaplane your face?
For beginners, dermaplaning can take 15-20 minutes as you carefully work through each section. Once you’re experienced and comfortable with the technique, you can complete your entire face in about 10 minutes. - Can I dermaplane if I have acne?
You should avoid dermaplaning over active breakouts, inflamed pimples, or cystic acne, as it can spread bacteria and worsen the condition. However, if you only have occasional blemishes, you can carefully work around them. Wait until your skin is clear before dermaplaning those areas. - Is dermaplaning the same as shaving?
No, while both use a blade, they’re different techniques. Shaving uses a multi-blade razor at a 90-degree angle primarily to remove hair. Dermaplaning uses a single surgical blade at a 45-degree angle to exfoliate dead skin cells and remove fine hair simultaneously. - Can I wear makeup after dermaplaning?
It’s best to wait at least a few hours before applying makeup to let your skin calm down. If you must wear makeup immediately, use mineral-based products that won’t clog your newly opened pores. Many people prefer to dermaplane at night to give skin time to recover. - Will dermaplaning help with acne scars?
Dermaplaning can help minimize the appearance of shallow acne scars over time by promoting cell turnover and smoothing skin texture. However, it won’t eliminate deep scars. For significant scarring, consider professional treatments like microneedling or laser therapy. - Can men dermaplane their faces?
Yes, men can dermaplane areas where they don’t have thick beard hair, such as the forehead and cheek bones. However, dermaplaning isn’t recommended for areas with coarse terminal hair (like the beard area), as it’s designed for fine vellus hair only. - What’s the difference between dermaplaning and microdermabrasion?
Dermaplaning uses a blade to manually scrape away dead skin, while microdermabrasion uses a machine with tiny crystals or a diamond tip to physically exfoliate. Both remove dead skin cells, but dermaplaning also removes facial hair and is gentler on sensitive skin. - Can I dermaplane around my eyes?
You can dermaplane your upper cheekbones near the under-eye area, but avoid the delicate skin directly under your eyes and on your eyelids. This skin is too thin and sensitive for dermaplaning. Also, never dermaplane your eyebrows unless you want to remove them. - How do I know if I’m using the right angle?
The correct 45-degree angle looks like you’re creating a small triangle between the blade and your skin – not laying it flat (0 degrees) or holding it straight up (90 degrees). Practice in front of a mirror, and if you’re not seeing any dead skin collecting on the blade, adjust your angle slightly. You should see a small amount of white, peach-fuzz covered residue on the blade when you’re doing it correctly.