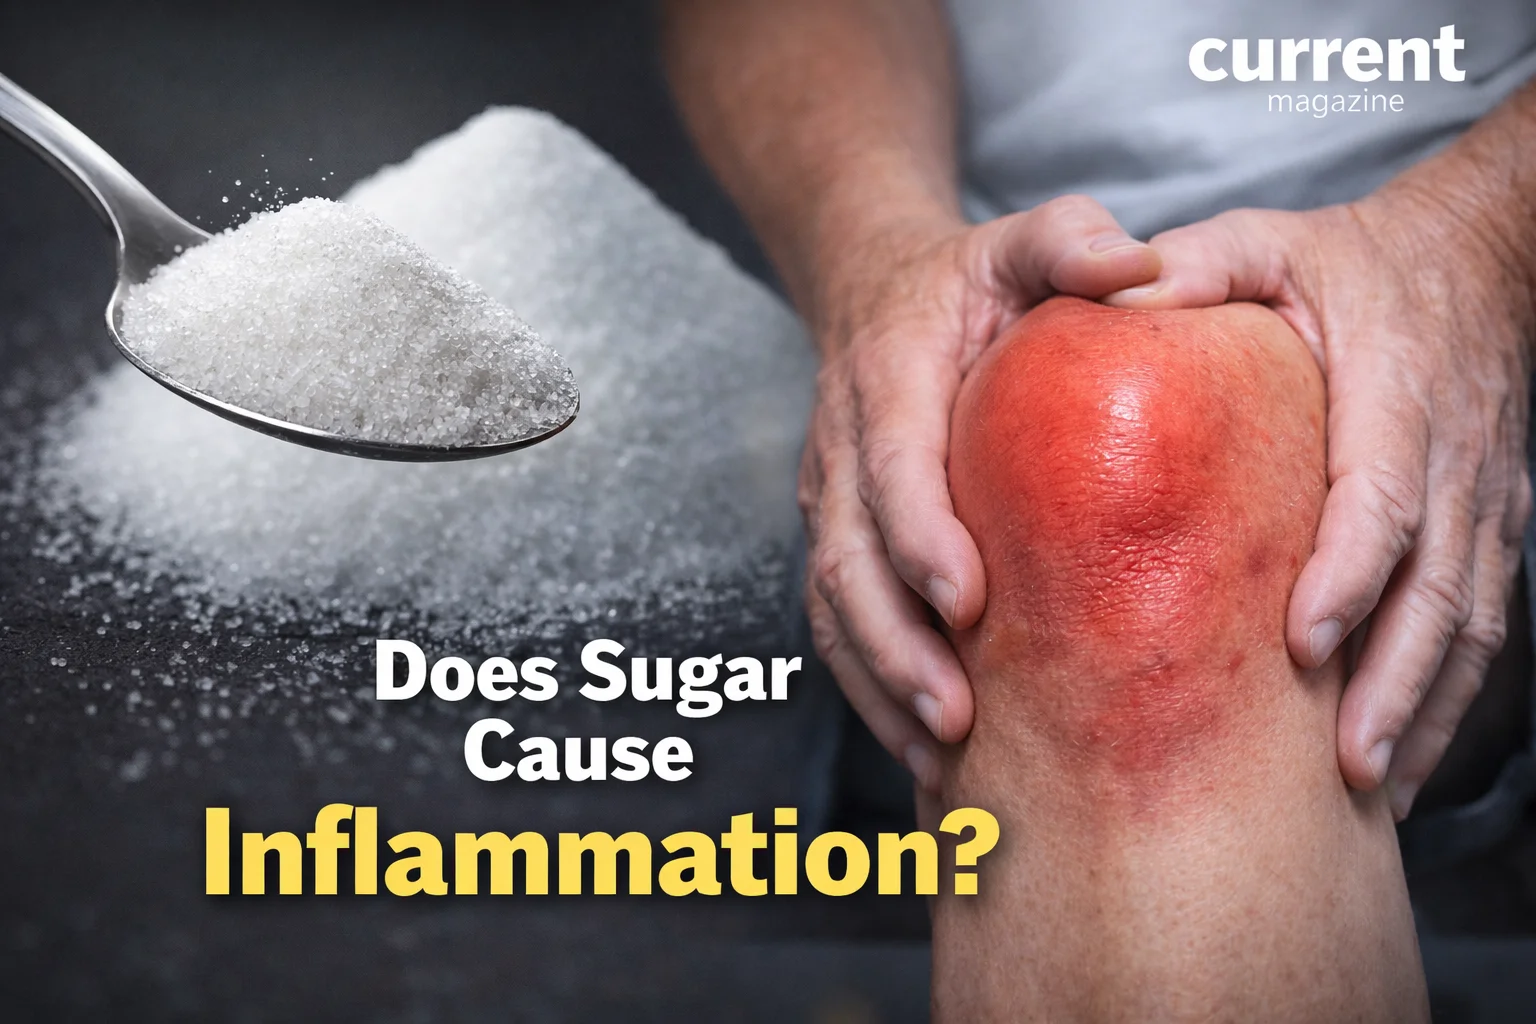
If you’ve been wondering “does sugar cause inflammation,” you’re asking one of the most important health questions of our time. The short answer is yes—excess sugar consumption does indeed cause inflammation in the body, and this inflammation is linked to numerous chronic diseases including diabetes, heart disease, arthritis, cancer, and Alzheimer’s disease. Understanding the relationship between sugar and inflammation can transform your health and help you make better dietary choices.
Inflammation is your body’s natural immune response to injury or infection, and short-term inflammation is actually protective and necessary for healing. However, chronic inflammation—persistent, low-level inflammation that lasts for months or years—damages healthy tissues and contributes to disease development. Sugar, particularly added sugars and refined carbohydrates, triggers inflammatory pathways in your body, elevating inflammatory markers in your blood and creating a state of chronic inflammation that silently damages your health over time.
In this comprehensive guide, we’ll explore the science behind how sugar causes inflammation, examine what happens in your body when you consume sugar, identify which types of sugar are most problematic, discuss the health consequences of sugar-induced inflammation, review the scientific evidence linking sugar to chronic diseases, and provide practical strategies for reducing sugar intake and combating inflammation through diet and lifestyle changes. Whether you’re managing a chronic health condition, trying to prevent disease, or simply want to optimize your health, understanding the sugar-inflammation connection is essential knowledge for modern life.
Understanding Inflammation: The Basics
Before diving into sugar’s role, let’s understand what inflammation actually is and why it matters.
What Is Inflammation?
Inflammation is your immune system’s response to harmful stimuli. It’s a complex biological process involving various cells, chemicals, and pathways designed to protect and heal your body.
Acute (Short-Term) Inflammation – The Good Kind
This is your body’s immediate response to injury or infection: When you cut your finger, sprain an ankle, or catch a cold, your immune system springs into action. Blood vessels dilate to increase blood flow to the affected area (causing redness and warmth). Fluid accumulates, causing swelling. Immune cells rush to the area to fight infection, remove damaged tissue, and begin repair. Chemicals are released that cause pain (alerting you to the problem). This process typically lasts days to weeks and resolves once healing is complete. Acute inflammation is protective, necessary, and generally beneficial.
Chronic (Long-Term) Inflammation – The Harmful Kind
This is persistent, low-level inflammation that continues for months or years: Instead of resolving after healing, inflammatory processes remain active. Low levels of inflammatory chemicals circulate continuously in your bloodstream. Your immune system stays partially activated, as if constantly fighting a threat. Over time, this chronic inflammation damages healthy tissues, blood vessels, organs, and cells. Chronic inflammation contributes to or causes most chronic diseases including heart disease, diabetes, cancer, Alzheimer’s disease, arthritis, autoimmune conditions, and more.
How We Measure Inflammation
Several blood markers indicate inflammation levels:
C-reactive protein (CRP): One of the most common inflammatory markers. Levels above 3.0 mg/L indicate high inflammation and increased disease risk.
Interleukin-6 (IL-6): A pro-inflammatory cytokine (cell signaling molecule). Elevated levels indicate active inflammation.
Tumor necrosis factor-alpha (TNF-α): Another pro-inflammatory cytokine associated with chronic inflammation.
Erythrocyte sedimentation rate (ESR): Measures how quickly red blood cells settle; faster rates suggest inflammation.
These markers help doctors and researchers track inflammation levels and assess disease risk.
Why Chronic Inflammation Matters
Chronic inflammation is now recognized as a root cause of most chronic diseases. It’s been called the “silent killer” because it often produces no obvious symptoms until significant damage has occurred. Understanding what causes chronic inflammation—including dietary factors like sugar—is crucial for disease prevention.
How Sugar Causes Inflammation: The Science Explained
Now let’s examine the specific mechanisms by which sugar triggers inflammatory processes in your body.
1. Blood Sugar Spikes and Oxidative Stress
When you consume sugar, especially refined sugars and high-glycemic foods, your blood glucose rises rapidly.
The cascade of events:
Eating sugary food causes blood glucose to spike quickly and sharply. Your pancreas responds by releasing a surge of insulin to move glucose from blood into cells. High blood glucose and insulin levels trigger the production of free radicals (unstable molecules that damage cells). These free radicals cause oxidative stress—an imbalance between harmful free radicals and protective antioxidants. Oxidative stress directly activates inflammatory pathways in cells, triggering the release of inflammatory chemicals like cytokines. This happens every time you consume high-sugar foods, and repeated spikes create chronic inflammation.
The research evidence:
Studies show that consuming 40 grams of added sugar (about one 12-ounce soda) significantly increases inflammatory markers within just 1-2 hours. The inflammatory response can last for several hours after sugar consumption. Regular consumption of sugary foods keeps you in a constant state of elevated inflammation.
2. Advanced Glycation End Products (AGEs)
AGEs are harmful compounds formed when sugar molecules bind to proteins or fats in a process called glycation.
How AGEs form and cause inflammation:
When blood sugar is elevated, glucose molecules attach to proteins and fats in your blood and tissues. This creates AGEs—sticky, damaged molecules that accumulate in tissues. AGEs bind to receptors on cell surfaces called RAGEs (receptors for advanced glycation end products). When AGEs bind to RAGEs, they trigger inflammatory signaling pathways. This activates NF-κB (nuclear factor kappa B), a master regulator of inflammation that turns on genes producing inflammatory chemicals. The result is increased production of cytokines, chemokines, and other inflammatory molecules.
Where AGEs accumulate:
AGEs build up in blood vessels, contributing to atherosclerosis (hardening of arteries). They accumulate in kidneys, eyes, nerves, and other tissues, causing damage. They’re found in skin, contributing to aging and wrinkles. They deposit in brain tissue, potentially contributing to Alzheimer’s disease.
AGEs from food:
While your body produces AGEs from high blood sugar, you also consume AGEs in food. Foods cooked at high temperatures (grilling, frying, roasting) contain high levels of AGEs. Combining sugar with high-heat cooking dramatically increases AGE formation. Processed foods often contain high AGE levels.
3. Insulin Resistance and Inflammatory Pathways
Chronic high sugar consumption leads to insulin resistance, which is inherently inflammatory.
The insulin resistance-inflammation cycle:
Frequent sugar consumption keeps insulin levels chronically elevated. Over time, cells become less responsive to insulin (insulin resistance). To overcome this resistance, the pancreas produces even more insulin. High insulin levels directly activate inflammatory pathways. Insulin resistance also causes fat cells (adipocytes) to release inflammatory cytokines. Visceral fat (belly fat) that accumulates with insulin resistance is particularly inflammatory, acting as an endocrine organ releasing inflammatory chemicals. This creates a vicious cycle: inflammation worsens insulin resistance, and insulin resistance increases inflammation.
Research findings:
People with insulin resistance have significantly higher levels of inflammatory markers (CRP, IL-6, TNF-α). Even in otherwise healthy individuals, higher sugar intake correlates with higher inflammation markers. Reducing sugar and improving insulin sensitivity reduces inflammation.
4. Gut Health Disruption
Sugar negatively affects your gut microbiome (the trillions of bacteria in your digestive system), and gut health is intimately connected to whole-body inflammation.
How sugar disrupts gut health:
Sugar feeds harmful bacteria and yeast in the gut (like Candida). These harmful organisms can overgrow, crowding out beneficial bacteria. The imbalance (dysbiosis) damages the intestinal barrier. This can lead to “leaky gut” where the intestinal lining becomes permeable. Bacterial toxins and partially digested food particles leak through the damaged barrier into the bloodstream. Your immune system recognizes these as foreign invaders and mounts an inflammatory response. This systemic inflammation affects the entire body, not just the gut.
The gut-brain-inflammation axis:
An unhealthy gut produces inflammatory chemicals that can reach the brain. This gut-derived inflammation is linked to depression, anxiety, brain fog, and neurodegenerative diseases. Sugar’s impact on gut health creates inflammation that extends far beyond the digestive system.
5. Activation of Inflammatory Genes
Sugar consumption actually changes gene expression, turning on genes that promote inflammation.
Nutrigenomics—how food affects genes:
While you can’t change your DNA sequence, you can change which genes are “turned on” or “off.” Sugar activates genes involved in inflammatory pathways. It triggers the transcription factor NF-κB, which activates dozens of genes producing inflammatory molecules. Sugar also influences other inflammatory pathways including MAPK (mitogen-activated protein kinase) and JAK-STAT signaling. The result is increased production of inflammatory cytokines (IL-1, IL-6, TNF-α), chemokines (chemicals that recruit immune cells), and enzymes that damage tissue (like matrix metalloproteinases).
Individual genetic susceptibility:
Some people have genetic variations that make them more susceptible to sugar’s inflammatory effects. Certain gene variants (SNPs – single nucleotide polymorphisms) affect how strongly you respond to dietary sugar. This explains why some people seem more affected by sugar than others. However, regardless of genetics, excess sugar increases inflammation in everyone.
6. Fructose’s Unique Inflammatory Effects
Fructose, especially high-fructose corn syrup (HFCS), has particularly strong inflammatory effects.
Why fructose is uniquely problematic:
Unlike glucose (which every cell can use), fructose is metabolized almost exclusively in the liver. High fructose intake overwhelms the liver’s processing capacity. The liver converts excess fructose to fat through de novo lipogenesis. This creates fatty liver disease (non-alcoholic fatty liver disease or NAFLD), which is inherently inflammatory. Fructose metabolism produces uric acid as a byproduct, which triggers inflammation and contributes to gout. Fructose increases AGE formation more than glucose. It may promote inflammation more directly through specific cellular signaling pathways.
Sources of high fructose:
Table sugar (sucrose) is 50% fructose, 50% glucose. High-fructose corn syrup (in most sodas and processed foods) is typically 55% fructose, 45% glucose. Agave nectar is extremely high in fructose (up to 90%). Even natural sources like fruit juice concentrate are high in fructose. Whole fruits contain fructose too, but the fiber, nutrients, and lower concentration make them much healthier.
Types of Sugar and Their Inflammatory Effects
Not all sugars are equal in their inflammatory impact. Understanding the differences helps you make better choices.
Added Sugars (Most Inflammatory)
These are sugars added to foods during processing or preparation, not naturally occurring in whole foods.
Common added sugars:
White sugar (sucrose), brown sugar, high-fructose corn syrup, corn syrup, agave nectar, honey (when added to processed foods), maple syrup (in processed foods), dextrose, maltose, and dozens of other names on ingredient labels.
Why added sugars are so inflammatory:
They’re typically consumed in large quantities because they’re concentrated and not accompanied by fiber. They cause rapid blood sugar spikes because there’s no fiber to slow absorption. They’re often combined with refined carbohydrates, unhealthy fats, and artificial ingredients, compounding inflammation. They provide “empty calories”—energy without nutrients, potentially displacing nutritious anti-inflammatory foods.
Major sources of added sugars:
Soft drinks and sweetened beverages (largest source for most people), candy and desserts, breakfast cereals and bars, baked goods (cookies, cakes, pastries), flavored yogurts, condiments and sauces (ketchup, BBQ sauce, salad dressings), sweetened coffee and tea drinks, and processed foods in general.
Recommended limits:
The American Heart Association recommends no more than 25 grams (6 teaspoons) daily for women and 36 grams (9 teaspoons) for men. Yet the average American consumes 77 grams (19 teaspoons) daily—more than triple the recommended amount.
Refined Carbohydrates (Highly Inflammatory)
While not technically “sugar,” refined carbs behave very similarly in your body.
What are refined carbohydrates:
White bread, white rice, white pasta, crackers, pastries, most breakfast cereals, pretzels, and other foods made from refined grains with fiber and nutrients removed.
Why they’re inflammatory:
They’re rapidly digested and converted to glucose, causing blood sugar spikes similar to pure sugar. They have a high glycemic index (GI), meaning they raise blood sugar quickly. The refining process strips away fiber, vitamins, minerals, and phytochemicals that would help buffer the glucose response and provide anti-inflammatory benefits. Like added sugar, they often displace more nutritious, anti-inflammatory whole foods from the diet.
Natural Sugars in Whole Foods (Least Inflammatory)
Sugars naturally present in whole fruits, vegetables, and dairy have much less inflammatory impact.
Examples:
Fructose in whole fruits, lactose in milk and plain yogurt, and small amounts of sugars in vegetables.
Why whole food sugars are different:
They come packaged with fiber, which slows sugar absorption and prevents blood sugar spikes. Whole foods contain vitamins, minerals, antioxidants, and phytochemicals that combat inflammation. The sugar is less concentrated—you’d need to eat several oranges to get the sugar in one glass of orange juice. Whole fruits and vegetables are actually anti-inflammatory despite containing natural sugars.
The verdict on whole fruits:
Multiple studies show that whole fruit consumption is associated with reduced inflammation, not increased inflammation. The fiber, polyphenols (like quercetin and anthocyanins), vitamins (especially vitamin C), and other compounds more than compensate for the natural sugar content. Berry consumption, in particular, is strongly anti-inflammatory. Even though fruit contains fructose, eating whole fruit doesn’t have the same harmful effects as consuming isolated fructose in soda or processed foods.
Important distinction:
Whole fruit = anti-inflammatory, Fruit juice = potentially inflammatory (all the sugar, none of the fiber), Dried fruit = moderate (concentrated sugar, but fiber intact; watch portions).
Artificial Sweeteners (Controversial)
The inflammatory effects of artificial sweeteners are debated and complex.
Common artificial sweeteners:
Aspartame (Equal, NutraSweet), sucralose (Splenda), saccharin (Sweet’N Low), acesulfame potassium (Ace-K), neotame.
The inflammation question:
Some research suggests certain artificial sweeteners may alter gut bacteria in ways that promote inflammation. They may affect glucose metabolism and insulin sensitivity despite having no calories. Individual responses vary widely. However, the evidence is mixed and more research is needed.
Natural non-caloric sweeteners:
Stevia and monk fruit are plant-derived options. They appear to have neutral or possibly beneficial effects on inflammation, but long-term data is limited.
The practical approach:
If you’re trying to reduce inflammation, prioritize eliminating added sugars over worrying about occasional use of non-caloric sweeteners. Transitioning to less sweet foods overall is ideal. Don’t replace sugar calories with artificial sweeteners and assume you’ve solved the problem—focus on whole, unprocessed foods.
The Health Consequences of Sugar-Induced Inflammation
Chronic inflammation from excess sugar consumption contributes to virtually every major chronic disease. Let’s examine the connections.
Type 2 Diabetes
The link between sugar, inflammation, and diabetes is particularly well-established.
How sugar-induced inflammation leads to diabetes:
Chronic sugar consumption causes insulin resistance through inflammatory pathways. Inflammation in fat tissue and liver interferes with insulin signaling. Inflammatory cytokines directly impair pancreatic beta cells (the cells that produce insulin). Over time, the pancreas can’t produce enough insulin to overcome resistance, leading to elevated blood glucose (diabetes). The relationship is bidirectional—inflammation causes insulin resistance, and high blood sugar causes more inflammation.
The evidence:
Studies show that people with higher sugar intake have significantly increased diabetes risk. Higher inflammatory markers predict diabetes development years before diagnosis. Reducing sugar intake and lowering inflammation improves blood sugar control. Anti-inflammatory dietary patterns (Mediterranean diet, anti-inflammatory diet) reduce diabetes risk.
Cardiovascular Disease (Heart Disease and Stroke)
Sugar-driven inflammation is a major contributor to cardiovascular disease, independent of other risk factors.
Mechanisms linking sugar, inflammation, and heart disease:
Inflammation in artery walls promotes atherosclerosis (plaque buildup). Inflammatory chemicals damage the endothelium (inner lining of blood vessels). This damage allows LDL cholesterol to penetrate arterial walls where it becomes oxidized (another inflammatory process). Oxidized LDL triggers even more inflammation and plaque formation. AGEs accumulate in arterial walls, making them stiff and prone to rupture. Inflammation makes existing plaques unstable and likely to rupture, causing heart attacks or strokes. Inflammatory processes promote blood clot formation.
Research findings:
Higher sugar intake is associated with increased risk of heart disease death, even after controlling for other risk factors. People who get 25% or more of calories from added sugar have nearly triple the cardiovascular death risk compared to those getting less than 10%. Just one or two sugar-sweetened beverages daily increases heart disease risk by 20-30%. Inflammatory markers (CRP, IL-6) strongly predict heart attack and stroke risk.
Cancer
Emerging research links sugar consumption, chronic inflammation, and cancer development and progression.
How inflammation promotes cancer:
Chronic inflammation creates an environment conducive to cancer development. Inflammatory chemicals can damage DNA, causing mutations. Inflammation promotes cell proliferation (growth), potentially allowing cancer cells to multiply. It suppresses the immune system’s ability to detect and destroy abnormal cells. Inflammation promotes angiogenesis (blood vessel formation) that tumors need to grow. It helps cancer cells metastasize (spread) to other parts of the body.
The sugar-cancer-inflammation connection:
High blood sugar and insulin levels (from sugar consumption) promote cancer cell growth because cancer cells often have more insulin receptors. Insulin and IGF-1 (insulin-like growth factor) stimulated by sugar are growth factors for many cancers. Sugar-induced inflammation creates the tumor-promoting environment. Obesity (often from excess sugar) involves chronic inflammation that increases cancer risk.
Evidence:
Higher sugar consumption is associated with increased risk of several cancers including colorectal, breast, pancreatic, and endometrial cancers. People with diabetes (characterized by both high blood sugar and inflammation) have increased cancer risk for multiple cancer types. Dietary patterns that reduce inflammation are associated with lower cancer risk.
Alzheimer’s Disease and Cognitive Decline
The brain is particularly vulnerable to inflammation, and sugar consumption may contribute to neurodegenerative diseases.
The brain inflammation-Alzheimer’s connection:
Chronic inflammation in the brain (neuroinflammation) is a hallmark of Alzheimer’s disease. Inflammatory chemicals damage neurons and promote formation of amyloid plaques and tau tangles (the pathological features of Alzheimer’s). Inflammation impairs the brain’s ability to clear these toxic proteins. High blood sugar and insulin resistance affect brain metabolism. The brain becomes “insulin resistant,” impairing glucose uptake and energy production. AGEs accumulate in brain tissue and blood vessels supplying the brain.
Why some call Alzheimer’s “Type 3 Diabetes”:
Insulin resistance in the brain impairs neuronal function and survival. Brain insulin signaling is crucial for memory and learning. The metabolic dysfunction and inflammation in Alzheimer’s brains resembles what happens in diabetes. Sugar-induced processes affect both conditions.
Research evidence:
People with diabetes have 1.5-2 times the risk of developing Alzheimer’s. Higher blood sugar levels (even in non-diabetic range) predict cognitive decline and dementia. Higher inflammatory markers are associated with increased Alzheimer’s risk and faster cognitive decline. Diets high in sugar and refined carbs increase dementia risk. Anti-inflammatory dietary patterns (like Mediterranean diet) reduce Alzheimer’s risk by up to 50%.
Arthritis and Joint Pain
Inflammation is central to arthritis, and sugar consumption can worsen joint inflammation and pain.
Types of arthritis affected by sugar:
Osteoarthritis (wear-and-tear arthritis): While primarily mechanical, inflammation plays a significant role in pain and progression. Sugar-induced systemic inflammation worsens joint inflammation. Obesity from excess sugar increases mechanical stress on joints. Rheumatoid arthritis (autoimmune arthritis): This is fundamentally an inflammatory disease. Sugar consumption can increase disease activity and symptoms. Gout: Fructose consumption increases uric acid production, directly triggering gout attacks.
How sugar worsens arthritis:
Systemic inflammation from sugar increases joint inflammation and pain. AGEs accumulate in joint cartilage and connective tissues, making them brittle and prone to damage. Sugar promotes obesity, which mechanically stresses joints and increases inflammation from fat tissue. Inflammatory cytokines degrade cartilage and bone.
Patient experiences:
Many arthritis patients report that reducing sugar significantly decreases pain and stiffness. Anti-inflammatory diets often provide substantial symptom relief. Some patients can reduce medication needs by eliminating sugar and adopting anti-inflammatory eating patterns.
Autoimmune Diseases
Autoimmune conditions involve the immune system attacking the body’s own tissues, and inflammation is central to these diseases.
Sugar’s role in autoimmune disease:
Sugar-induced gut dysbiosis and leaky gut may trigger or worsen autoimmune reactions. Inflammation promotes immune dysregulation. High blood sugar impairs immune system regulation. Some research suggests sugar consumption may increase autoimmune disease risk or severity.
Conditions potentially affected:
Multiple sclerosis, lupus, inflammatory bowel disease (Crohn’s disease, ulcerative colitis), psoriasis, Hashimoto’s thyroiditis, celiac disease, and Type 1 diabetes (though the role of dietary sugar in development is less clear than in Type 2).
Aging and Inflammaging
“Inflammaging” refers to the chronic low-grade inflammation that increases with age and drives many age-related diseases.
Sugar accelerates biological aging through:
Chronic inflammation that damages DNA, cells, and tissues. AGE formation that accumulates in tissues, causing them to age faster (including visible skin aging). Oxidative stress that damages cellular components. Telomere shortening (telomeres are protective caps on chromosomes that shorten with age; inflammation accelerates this). Metabolic dysfunction and cellular senescence (cells that stop dividing but don’t die, producing inflammatory chemicals).
The result:
Higher sugar consumption is associated with accelerated biological aging. People with high sugar intake may have biological ages years older than their chronological ages. Reducing sugar and inflammation can slow aging processes.
Scientific Evidence: What Research Shows
Let’s examine key studies demonstrating the sugar-inflammation link.
Landmark Studies
The Framingham Heart Study
This long-term study following thousands of participants found that soft drink consumption was associated with increased levels of inflammatory markers. Just one soft drink daily significantly increased CRP levels. The association persisted even after controlling for other lifestyle factors and obesity.
The Nurses’ Health Study
This massive study of over 100,000 women found that higher consumption of sugar-sweetened beverages was associated with elevated inflammatory markers including CRP and IL-6. Women who consumed more than two servings daily had 20% higher CRP levels than those who consumed less than one serving monthly. The inflammatory effects were independent of obesity, though obesity amplified them.
Randomized Controlled Trials
Sugar intervention studies:
When healthy volunteers consumed 40 grams of added sugar (amount in one 12-ounce soda), inflammatory markers increased within 1-2 hours and remained elevated for several hours. Studies where participants eliminated added sugars for several weeks showed significant reductions in inflammatory markers. Replacing sugar with complex carbohydrates or protein reduced inflammation.
The DIRECT trial:
This study compared different diets and found that low-carbohydrate diets (which naturally reduce sugar) decreased inflammatory markers more than low-fat diets. The reduction in refined carbohydrates and sugars was key to the anti-inflammatory effect.
Meta-Analyses and Systematic Reviews
Multiple meta-analyses (studies combining results from many individual studies) have concluded:
Sugar-sweetened beverage consumption is consistently associated with increased inflammatory markers. Higher dietary glycemic index and glycemic load (measures of how foods affect blood sugar) predict higher inflammation. Reducing added sugar intake decreases inflammatory markers. The relationship between sugar and inflammation is dose-dependent—more sugar means more inflammation.
Dose-Response Relationships
Research shows the inflammation-sugar relationship is not all-or-nothing:
Even moderate sugar consumption increases inflammation above baseline. The more sugar consumed, the higher the inflammatory response. Reducing sugar—even without eliminating it entirely—provides benefits. Every reduction helps, though greater reductions provide greater benefits.
What About Natural Sugars?
Studies consistently show:
Whole fruit consumption is associated with reduced inflammation, not increased, despite natural sugar content. The protective nutrients in whole fruits outweigh any inflammatory potential of their natural sugars. Vegetable consumption is strongly anti-inflammatory. Dairy consumption shows neutral to slightly anti-inflammatory effects in most studies.
How to Reduce Sugar-Induced Inflammation
Understanding the problem is the first step. Here’s how to take action.
1. Identify and Eliminate Added Sugars
Read food labels carefully:
Added sugars appear under dozens of names: sucrose, high-fructose corn syrup, corn syrup, dextrose, maltose, glucose, fructose, agave nectar, cane sugar, cane juice, evaporated cane juice, brown rice syrup, malt syrup, and many others. Check the “added sugars” line on nutrition labels (required on U.S. labels as of 2020). Ingredient lists are ordered by amount—if sugar appears in the first few ingredients, the product is high in sugar.
Biggest sources to target:
Eliminate or drastically reduce soft drinks and sweetened beverages (single biggest source). Limit fruit juices—even 100% juice—to small amounts or eliminate entirely. Avoid or limit candy, cookies, cakes, and desserts. Choose unsweetened versions of foods: plain yogurt instead of flavored, unsweetened almond milk instead of sweetened, etc. Read labels on seemingly healthy foods like granola bars, breakfast cereals, protein bars, and flavored oatmeal—many are loaded with added sugar. Check condiments and sauces—ketchup, BBQ sauce, teriyaki sauce, and salad dressings often contain shocking amounts of sugar.
2. Choose Low-Glycemic, Whole Foods
Replace high-glycemic refined carbs with low-glycemic whole foods:
Instead of white rice, choose: Brown rice, quinoa, farro, barley.
Instead of white bread, choose: 100% whole grain bread (check that “whole grain” is the first ingredient), sourdough bread (the fermentation process lowers glycemic impact).
Instead of regular pasta, choose: Whole grain pasta, legume-based pasta (made from lentils, chickpeas), or vegetable alternatives like zucchini noodles.
Focus on:
Non-starchy vegetables (unlimited amounts)—these are powerfully anti-inflammatory. Legumes (beans, lentils, chickpeas)—high in fiber and protein, low glycemic index. Nuts and seeds—anti-inflammatory fats and protein. Whole grains in moderation—intact grains like steel-cut oats, brown rice, quinoa. Healthy proteins—fish (especially fatty fish like salmon), poultry, eggs, plant proteins.
3. Adopt an Anti-Inflammatory Diet Pattern
Several dietary patterns are proven to reduce inflammation:
Mediterranean Diet:
Rich in vegetables, fruits, whole grains, legumes, nuts, and olive oil. Includes moderate amounts of fish and poultry. Limited red meat and sweets. This pattern is one of the most studied and consistently shows anti-inflammatory effects and reduced chronic disease risk.
Anti-Inflammatory Diet (Dr. Andrew Weil’s approach):
Similar to Mediterranean but with specific attention to anti-inflammatory foods. Emphasizes colorful vegetables and fruits (antioxidants), omega-3 fatty acids from fish and other sources, whole grains, tea, dark chocolate (in moderation), and herbs and spices. Minimizes omega-6 fatty acids from vegetable oils, processed foods, and sugars.
Whole Foods, Plant-Based Diet:
Emphasizes whole plant foods—vegetables, fruits, whole grains, legumes, nuts, and seeds. Minimizes or eliminates animal products and processed foods. When well-planned, this pattern is highly anti-inflammatory.
Low-Carb/Ketogenic (for some people):
Dramatically reducing carbohydrates (including sugars and starches) can reduce inflammation in some individuals, particularly those with insulin resistance or diabetes. However, this approach should emphasize healthy fats and vegetables, not just eliminating carbs.
Common principles across all anti-inflammatory diets:
Eliminate or minimize added sugars and refined carbohydrates. Emphasize whole, unprocessed foods. Include abundant vegetables and moderate fruit. Choose healthy fats (olive oil, avocados, nuts, fatty fish). Limit or avoid processed foods, industrial seed oils, and trans fats.
4. Increase Anti-Inflammatory Foods
Actively include foods that fight inflammation:
Fatty fish: Salmon, sardines, mackerel, anchovies—rich in omega-3 fatty acids (EPA and DHA) that reduce inflammatory molecules. Aim for 2-3 servings weekly.
Berries: Blueberries, strawberries, blackberries, raspberries—packed with anthocyanins and other polyphenols that reduce inflammation. Eat daily if possible.
Leafy greens: Spinach, kale, collard greens, Swiss chard—rich in vitamins, minerals, and anti-inflammatory compounds. Eat daily in large quantities.
Cruciferous vegetables: Broccoli, cauliflower, Brussels sprouts, cabbage—contain sulforaphane and other compounds that reduce inflammation. Include several times weekly.
Turmeric: Contains curcumin, a powerful anti-inflammatory compound. Add to food or take as a supplement (with black pepper to enhance absorption).
Ginger: Anti-inflammatory properties well-documented. Use fresh or dried in cooking and teas.
Green tea: Rich in polyphenols, especially EGCG (epigallocatechin gallate), which reduces inflammation. Drink 2-4 cups daily.
Extra virgin olive oil: Contains oleocanthal and other anti-inflammatory compounds. Use as primary fat source.
Nuts: Especially walnuts (high in omega-3s) and almonds. Handful daily.
Dark chocolate: 70% cacao or higher contains flavonoids that reduce inflammation. Small amounts (1-2 ounces) provide benefits.
5. Lifestyle Factors That Reduce Inflammation
Diet is crucial, but other lifestyle factors also affect inflammation:
Exercise regularly:
Physical activity reduces inflammatory markers and helps control weight. Both aerobic exercise and strength training provide benefits. Aim for 150 minutes of moderate activity or 75 minutes of vigorous activity weekly. However, excessive exercise without adequate recovery can increase inflammation temporarily.
Maintain healthy weight:
Excess body fat, especially visceral (belly) fat, is inflammatory. Weight loss, particularly when achieved by reducing sugar and processed foods, significantly reduces inflammation. Even 5-10% body weight loss can substantially lower inflammatory markers.
Prioritize sleep:
Poor sleep increases inflammatory markers. Chronic sleep deprivation is associated with higher CRP, IL-6, and TNF-α. Aim for 7-9 hours of quality sleep nightly. Addressing sleep apnea (if present) can significantly reduce inflammation.
Manage stress:
Chronic psychological stress increases inflammation through multiple pathways. Stress management techniques (meditation, yoga, deep breathing, counseling) reduce inflammatory markers. Even 10-20 minutes daily of stress-reduction practice helps.
Don’t smoke:
Smoking is powerfully pro-inflammatory. Quitting smoking reduces inflammation substantially within weeks to months.
Limit alcohol:
While moderate alcohol consumption (especially red wine) may have some anti-inflammatory effects, excessive alcohol is pro-inflammatory and harmful. If you drink, limit to one drink daily for women, two for men, or less.
6. Consider Supplements (With Medical Guidance)
Certain supplements may help reduce inflammation:
Omega-3 fatty acids (fish oil): EPA and DHA reduce inflammatory molecules. Look for high-quality supplements with 1000-2000mg combined EPA/DHA daily.
Curcumin (from turmeric): Choose supplements with enhanced absorption (with piperine/black pepper or in liposomal form). Typical dose: 500-1000mg daily.
Vitamin D: Deficiency is associated with increased inflammation. If deficient, supplementation reduces inflammatory markers. Have levels tested; supplement to achieve optimal levels (30-50 ng/mL).
Probiotics: Supporting gut health may reduce inflammation. Choose multi-strain formulas with at least 10 billion CFU.
Important notes:
Supplements complement, not replace, a healthy diet. Consult healthcare providers before starting supplements, especially if you take medications. Quality varies tremendously—choose reputable brands with third-party testing.
Monitoring Your Progress
Tracking changes helps you see the benefits of reducing sugar and inflammation.
Subjective Improvements
Many people notice benefits within days to weeks:
More stable energy throughout the day (fewer energy crashes). Better mental clarity and focus. Improved mood and reduced anxiety or depression. Better sleep quality. Reduced joint pain and stiffness. Clearer skin. Weight loss (if needed). Reduced cravings for sweets. Better digestive function. Overall feeling of wellness.
Objective Measurements
If you want to quantify improvements, consider:
Blood tests for inflammatory markers:
Have CRP (C-reactive protein) tested before dietary changes and after 3-6 months. Optimal CRP is below 1.0 mg/L; above 3.0 mg/L indicates high inflammation and increased disease risk. Other markers like IL-6 or TNF-α can be tested but are less commonly ordered.
Metabolic markers:
Fasting glucose and HbA1c (measures average blood sugar over 3 months) should improve. Fasting insulin (often not routinely tested but informative) should decrease. Lipid panel (cholesterol, triglycerides) often improves—triglycerides particularly sensitive to sugar reduction.
Body composition:
Weight, waist circumference, and body fat percentage should improve if you’re overweight. Visceral fat reduction is particularly beneficial for inflammation.
Timeline for improvements:
Some inflammatory markers improve within days to weeks of dietary changes. CRP typically shows significant reduction after 6-12 weeks. Metabolic improvements (blood sugar, insulin) often occur within weeks to months. Weight loss and body composition changes take longer but provide lasting benefits.
Special Considerations for Specific Conditions
If you have certain health conditions, reducing sugar and inflammation is especially important:
Diabetes or Prediabetes
Reducing sugar is absolutely critical for blood sugar control and preventing complications. Focus on low-glycemic whole foods. Work with your healthcare team—medication adjustments may be needed as blood sugar improves. Monitor blood sugar regularly to track progress.
Heart Disease or High Cardiovascular Risk
Sugar reduction can significantly lower cardiovascular risk. Combine with other heart-healthy habits (exercise, stress management, not smoking). Mediterranean diet is particularly well-studied for cardiovascular protection.
Autoimmune Conditions
Many autoimmune patients report symptom improvement from eliminating sugar and adopting anti-inflammatory diets. Some benefit from additional restrictions (like gluten-free or elimination diets). Work with knowledgeable healthcare providers familiar with dietary approaches to autoimmune disease.
Arthritis
Patients often report substantial pain and stiffness reduction from sugar elimination. Combining sugar reduction with anti-inflammatory foods can provide significant relief. Some can reduce medication needs (discuss with doctor before changing medications).
Cancer Prevention or Treatment
Reducing sugar and inflammation may help prevent cancer and support treatment. Discuss dietary approaches with oncologist—they can complement but not replace conventional treatment. Maintaining adequate nutrition during cancer treatment is paramount.
Alzheimer’s Prevention
Given the strong links between sugar, inflammation, insulin resistance, and dementia, reducing sugar is a key prevention strategy. The earlier you start, the better. Combine with other brain-healthy habits (exercise, cognitive engagement, social connection, sleep).
Common Challenges and Solutions
Reducing sugar is challenging in our sugar-saturated food environment. Here’s how to overcome common obstacles:
Challenge: Intense Sugar Cravings
Solutions:
Understand that cravings typically decrease significantly after 1-2 weeks of sugar elimination. Eat adequate protein and healthy fats to maintain stable blood sugar. Don’t get overly hungry—eat regular meals and healthy snacks. Stay hydrated (thirst can masquerade as hunger/cravings). When cravings hit, distract yourself with an activity, drink water or herbal tea, or eat something with protein. Consider that cravings often have emotional components—address stress, boredom, or emotions without food. Allow small amounts of very dark chocolate (85% cacao or higher) as a less inflammatory sweet option.
Challenge: Sugar Is Everywhere
Solutions:
Plan ahead—pack healthy snacks and meals. Cook at home more often where you control ingredients. When eating out, make smart choices (unsweetened beverages, vegetables, protein). Don’t keep tempting foods at home. Prepare for social situations with a plan. Remember that brief social awkwardness is worth the long-term health benefits.
Challenge: Family Members Want Sugary Foods
Solutions:
Educate family about health impacts (children can understand age-appropriate explanations). Make gradual changes the whole family can accept. Keep sugary treats out of the house or limited to special occasions. Offer delicious healthy alternatives. Model the behavior you want to see. Be patient—family members often come around when they see your positive results.
Challenge: Budget Concerns
Solutions:
Reducing sugar can actually save money (no expensive sodas, candy, desserts). Whole foods like beans, lentils, oats, eggs, frozen vegetables, and seasonal produce are affordable. Cook at home rather than buying processed convenience foods. Buy in bulk when possible. Focus on affordable anti-inflammatory foods rather than expensive supplements or specialty items.
Challenge: Lack of Time
Solutions:
Simple meals are fine—you don’t need elaborate recipes. Batch cook on weekends. Use time-saving tools (slow cooker, pressure cooker, pre-cut vegetables). Keep healthy convenience foods on hand (canned beans, frozen vegetables, pre-cooked chicken). Prioritize—your health is worth the time investment.
Challenge: Social Pressure
Solutions:
Be confident in your choices without being preachy. Have a brief explanation ready (“I feel better without sugar”). Don’t make a big deal about it. Focus on what you can eat, not restrictions. Bring a dish to share at gatherings. True friends support your health goals.
The Bottom Line: Sugar, Inflammation, and Your Health
The evidence is clear and compelling: excess sugar consumption causes chronic inflammation, and chronic inflammation drives most chronic diseases that reduce quality of life and shorten lifespan.
Key Takeaways:
Sugar causes inflammation through multiple biological pathways—blood sugar spikes, AGE formation, insulin resistance, gut dysbiosis, and inflammatory gene activation.
The type of sugar matters—added sugars and refined carbohydrates are most inflammatory, while natural sugars in whole foods are much less problematic.
Chronic inflammation from sugar contributes to diabetes, heart disease, cancer, Alzheimer’s disease, arthritis, autoimmune conditions, and accelerated aging.
The relationship is dose-dependent—more sugar means more inflammation; less sugar means less inflammation.
Reducing sugar and adopting an anti-inflammatory diet can significantly lower inflammatory markers within weeks to months.
The benefits extend beyond lab values—people often experience better energy, clearer thinking, less pain, improved mood, better sleep, and overall wellness.
It’s never too late to benefit—reducing sugar and inflammation at any age provides health benefits.
Small changes add up—you don’t have to be perfect; every reduction in sugar intake helps reduce inflammation and disease risk.
Combine dietary changes with other healthy lifestyle factors—exercise, sleep, stress management, and not smoking for maximum anti-inflammatory benefit.
Prevention is powerful—addressing sugar and inflammation now can prevent or delay chronic diseases and maintain quality of life as you age.
The modern Western diet, high in added sugars and refined carbohydrates, creates a state of chronic inflammation that silently damages your health. By understanding the sugar-inflammation connection and taking action to reduce sugar intake while increasing anti-inflammatory foods and habits, you can dramatically improve your health outcomes, feel better day-to-day, and reduce your risk of chronic disease.
Your body is designed to thrive on whole, unprocessed foods, not the sugar-laden processed products that dominate modern food environments. By returning to a more natural way of eating—rich in vegetables, fruits, whole grains, legumes, nuts, seeds, and healthy proteins—you can turn off inflammatory pathways, allow your body to heal, and experience the vitality and wellness you deserve.
The choice is yours. Every meal is an opportunity to either fuel inflammation or fight it. Choose wisely, and your body will thank you with better health, more energy, and a longer, more vibrant life.
10 Frequently Asked Questions About Sugar and Inflammation
1. How quickly does sugar cause inflammation after eating it?
Inflammatory processes begin remarkably quickly after consuming sugar. Within 30 minutes to 2 hours of eating sugary foods or high-glycemic carbohydrates, measurable increases in inflammatory markers can be detected in your bloodstream. Studies show that consuming just 40 grams of added sugar (the amount in one 12-ounce can of soda) causes a significant spike in inflammatory chemicals like C-reactive protein (CRP) and interleukin-6 (IL-6) within 1-2 hours. This inflammatory response typically peaks at 2-3 hours after consumption and can remain elevated for 3-6 hours or longer depending on the amount consumed and individual factors. The rapid blood sugar spike triggers oxidative stress and free radical production almost immediately, activating inflammatory pathways in cells. Insulin released in response to sugar also activates inflammatory signaling. However, the good news is that this acute inflammation from a single sugary meal or snack is temporary and resolves within several hours in healthy individuals. The real problem is chronic inflammation from repeated sugar consumption day after day, which keeps inflammatory pathways constantly activated and never allows full resolution. If you eat sugary foods multiple times daily, your body never fully recovers from one inflammatory insult before the next one begins, creating a state of persistent chronic inflammation that damages tissues over time.
2. Can I still eat fruit if I’m trying to reduce inflammation?
Yes, absolutely—whole fruits are actually anti-inflammatory despite containing natural sugars, and you should definitely include them in an anti-inflammatory diet. The key distinction is between whole fruits and isolated fruit sugars (like fruit juice or added fructose in processed foods). Whole fruits contain fiber that slows sugar absorption, preventing the rapid blood sugar spikes that trigger inflammation. A medium apple contains about 19 grams of natural sugar, but also 4 grams of fiber that moderates the glucose response. Fruits are packed with vitamins (especially vitamin C), minerals, antioxidants, and polyphenols (plant compounds) that actively fight inflammation and neutralize the free radicals that would otherwise be produced by sugar metabolism. Berries in particular are powerfully anti-inflammatory due to anthocyanins and other polyphenols—research shows regular berry consumption significantly reduces inflammatory markers. Studies consistently demonstrate that people who eat more whole fruit have lower levels of inflammation, not higher, and reduced risk of chronic diseases like heart disease and diabetes. The fruit’s nutrients more than compensate for any inflammatory potential of its natural sugars. However, there are important caveats: portion control matters—eating five apples in one sitting isn’t ideal; stick to 2-4 servings of whole fruit daily. Choose lower-sugar fruits when possible (berries, citrus, apples, pears) over very high-sugar tropical fruits (mangoes, pineapple, dates). Avoid or strictly limit fruit juice, which removes the protective fiber and concentrates the sugar—even 100% fruit juice can spike blood sugar similarly to soda. Dried fruit is more concentrated in sugar due to water removal; enjoy in moderation.
3. Is honey or maple syrup better than white sugar for inflammation?
Honey and maple syrup are only marginally better than white sugar when it comes to inflammation, and the differences are relatively minor. All concentrated sweeteners—whether refined white sugar, honey, maple syrup, agave nectar, or coconut sugar—cause blood sugar spikes and trigger inflammatory pathways because they’re concentrated sources of sugar without significant fiber or other protective components. The similarities: White sugar (sucrose) is 50% glucose and 50% fructose. Honey is approximately 40% fructose and 30% glucose (plus water and trace nutrients). Maple syrup is about 95% sucrose (which breaks down to glucose and fructose). All cause similar blood sugar responses and insulin spikes. All contribute to AGE formation when consumed in excess. All can promote inflammation when consumed in large amounts. The minor advantages of honey and maple syrup: They contain trace amounts of vitamins, minerals, and antioxidants that white sugar completely lacks—but you’d need to eat enormous (unhealthy) amounts to get meaningful nutritional benefits from these trace compounds. Honey contains some anti-inflammatory and antimicrobial compounds, but again, the amounts in typical servings are minimal. Some studies show slightly lower glycemic responses to certain honeys compared to table sugar, but the difference is small and doesn’t make honey a “health food.” Raw, unfiltered honey may have more beneficial compounds than heavily processed honey. The practical bottom line: Don’t fool yourself into thinking honey or maple syrup are healthy just because they’re “natural”—your body processes them very similarly to white sugar. If you use sweeteners occasionally, honey or maple syrup are marginally preferable to white sugar, but the key is “occasionally” and “small amounts.” Don’t dramatically increase consumption just because you’ve switched to a “natural” sweetener. The best approach is to reduce all sweeteners, regardless of type, and retrain your palate to enjoy less sweet foods. Save honey and maple syrup for occasional use in small amounts, not as everyday additions to coffee, tea, oatmeal, or yogurt.
4. Will artificial sweeteners reduce inflammation compared to sugar?
The relationship between artificial sweeteners and inflammation is complex and not as straightforward as you might hope. While artificial sweeteners don’t directly spike blood sugar the way sugar does, they’re not a perfect solution for reducing inflammation and may have other effects worth considering. What we know: Artificial sweeteners like aspartame, sucralose, and saccharin don’t contain calories or raise blood sugar directly, so they avoid the blood glucose spike and insulin response that trigger sugar’s inflammatory effects. Some studies show that replacing sugar-sweetened beverages with artificially sweetened ones can reduce inflammatory markers, likely because you’re eliminating the sugar’s inflammatory impact. However, other research suggests potential concerns: Some artificial sweeteners may alter gut bacteria composition in ways that could promote inflammation and metabolic dysfunction, though research findings are mixed and individual responses vary. They may affect glucose metabolism and insulin sensitivity despite having no calories—some studies show that regular artificial sweetener consumption is associated with glucose intolerance and changes in how the body responds to sugar. They may increase cravings for sweet foods and make it harder to reduce overall sweet taste preference. Some people report adverse reactions (headaches, digestive issues) to certain artificial sweeteners. Long-term health effects remain somewhat unclear—many studies show associations between artificial sweetener use and health problems, but determining cause-and-effect is difficult. Natural non-caloric sweeteners: Stevia (from the stevia plant) and monk fruit appear to have neutral or potentially beneficial metabolic effects in most research, with less concern about gut bacteria disruption. They may be better choices than artificial sweeteners if you need occasional sweetening. The practical recommendation: Artificial sweeteners are likely less inflammatory than sugar, but they’re not an ideal long-term solution. Use them as a temporary bridge while reducing your sweet taste preference, not as a permanent replacement. Focus on eliminating sweetness from your diet overall rather than just swapping sugar for artificial sweeteners. If you use sweeteners, stevia or monk fruit may be preferable to artificial options. Prioritize whole, unprocessed foods that don’t need sweetening.
5. How long does it take for inflammation to decrease after cutting out sugar?
The timeline for inflammation reduction after eliminating or drastically reducing sugar varies by individual but follows general patterns. Acute improvements (days to weeks): Within 24-48 hours of reducing sugar, you’ll stop experiencing the acute inflammatory spikes that occur after eating sugary foods, allowing baseline inflammation to begin decreasing. Many people report subjective improvements—better energy, clearer thinking, less joint stiffness—within 3-7 days of eliminating added sugars. Blood sugar levels and insulin begin normalizing within days to weeks, reducing one source of inflammatory signaling. Measurable inflammation reduction (weeks to months): Inflammatory markers like CRP, IL-6, and TNF-α typically show significant reductions within 3-6 weeks of consistent dietary changes. One study found that CRP levels dropped by an average of 30% after just 4 weeks of eliminating added sugars. Another showed that switching from a high-sugar to low-sugar diet reduced inflammatory markers by 25-40% within 8-12 weeks. Insulin resistance improves over weeks to months, further reducing inflammatory signaling. Gut microbiome changes (weeks to months): Your gut bacteria begin changing within days of dietary modification, but substantial remodeling takes weeks to months. As beneficial bacteria increase and harmful species decrease, gut-related inflammation improves. Tissue and cellular healing (months to years): AGEs that have accumulated in tissues over years of high sugar consumption slowly turn over as damaged proteins are replaced—this process takes months to years. Cellular damage from chronic inflammation repairs over months. Long-term benefits continue accruing over years of sustained dietary improvement. Factors affecting timeline: Starting inflammation level—if very high, improvements may be more dramatic and noticeable quickly. Overall diet quality—combining sugar elimination with anti-inflammatory foods accelerates benefits. Individual metabolism and genetics. Consistency—occasional sugar binges slow progress. Other lifestyle factors—exercise, sleep, stress management amplify benefits. The bottom line: You’ll likely feel better within a week or two, see measurable improvements in blood markers within 1-3 months, and experience continued benefits over months and years of sustained change. The sooner you start, the sooner you’ll benefit, and improvements continue as long as you maintain changes.
6. Can eating too much fruit cause inflammation like added sugar does?
It’s extremely unlikely that eating too much whole fruit will cause the same inflammatory problems as added sugar, though theoretically, consuming enormous quantities of fruit could have some negative effects. Here’s why whole fruit is different: The fiber in whole fruit dramatically slows sugar absorption, preventing the rapid blood sugar spikes that trigger inflammation. The vitamins, minerals, antioxidants, and polyphenols in fruit actively fight inflammation and oxidative stress, countering any inflammatory potential of the natural sugars. You have to eat a very large volume of whole fruit to consume the same amount of sugar as a small amount of candy or soda—satiety mechanisms (fiber, chewing, stomach volume) naturally limit intake. Population studies consistently show that higher whole fruit consumption is associated with lower inflammation and reduced disease risk, not higher. That said, there are some considerations: People with diabetes or severe insulin resistance might need to moderate even whole fruit intake and choose lower-sugar options (berries, citrus) over very sweet varieties. Dried fruit is more concentrated (water removed) and easier to overconsume—eat in moderation. Certain very high-sugar fruits eaten in excess (like dates, which are extremely sweet) might cause more of a blood sugar response. Eating fruit with protein or fat (like apple slices with almond butter) further moderates blood sugar response. A practical example: Eating two apples provides about 38 grams of natural sugar plus 8 grams of fiber, plus vitamins and antioxidants, absorbed slowly over time—this is vastly different from drinking a 12-ounce soda with 39 grams of added sugar, zero fiber, and zero nutrients, absorbed rapidly. The bottom line: For the vast majority of people, eating 2-4 servings of whole fruit daily is health-promoting and anti-inflammatory. You would need to eat truly excessive amounts of fruit (like 10+ servings daily) for the sugar to potentially become problematic, and the fiber and nutrients would still provide substantial protection. Focus on limiting added sugars and refined carbs, not whole fruit. If you have diabetes or metabolic concerns, work with a healthcare provider to determine appropriate fruit intake, but don’t eliminate fruit based on fears about natural sugar content.
7. Does the timing of sugar consumption matter for inflammation?
Yes, when you consume sugar does affect its inflammatory impact, though the differences are relatively modest compared to the total amount consumed. Several timing factors influence inflammation: Morning vs. evening consumption: Your body’s insulin sensitivity follows a circadian rhythm—you’re typically more insulin sensitive in the morning and less sensitive in the evening. This means morning sugar consumption may cause a smaller insulin spike and potentially less inflammation than the same amount consumed at night. Eating sugary foods late at night, especially before bed, can disrupt sleep quality and melatonin production, and poor sleep increases inflammation. Some research suggests later eating patterns are associated with higher inflammatory markers. However, morning sugar consumption isn’t “healthy”—it’s just potentially slightly less inflammatory than evening consumption. With or without other foods: Consuming sugar alongside protein, fat, and fiber significantly moderates the blood sugar spike and inflammatory response compared to consuming sugar alone on an empty stomach. For example, eating a cookie with a handful of nuts causes less inflammation than eating the cookie alone. Including protein and healthy fats with meals helps stabilize blood sugar throughout the day. Never eat sugary foods on an empty stomach—always combine with protein and/or fat if you do consume them. Around exercise: There’s a specific exception to sugar’s inflammatory effects: consuming simple carbohydrates immediately after intense exercise can help replenish glycogen stores and support recovery without the same inflammatory response as at other times. Muscles are more insulin-sensitive post-exercise and can take up glucose without the same insulin spike. However, this doesn’t give you license to eat unlimited sugar after workouts—moderate amounts of natural carbs (like fruit) are sufficient for most people. During stress or illness: Consuming sugar during times of psychological stress or illness may have amplified inflammatory effects because your body is already in a state of inflammation. The practical recommendations: If you consume any sugar, do so earlier in the day rather than late evening. Always combine sugary foods with protein, fat, and fiber to moderate blood sugar response. Never eat sugar on an empty stomach. Don’t use “timing strategies” as an excuse to consume large amounts of sugar—total intake still matters most. Focus on eliminating added sugars rather than optimizing timing.
8. Are certain people more susceptible to inflammation from sugar than others?
Yes, individual susceptibility to sugar-induced inflammation varies significantly based on genetics, existing health status, and lifestyle factors. People at higher risk include: Those with insulin resistance or prediabetes: Their cells already respond poorly to insulin, so sugar consumption causes larger insulin spikes and more inflammation. They may have chronically elevated inflammatory markers even before developing full diabetes. People with diabetes: High baseline blood sugar and insulin levels mean additional sugar causes even more dramatic spikes and inflammation. Diabetics show stronger inflammatory responses to sugar than metabolically healthy individuals. Those who are overweight or obese: Excess body fat, especially visceral (belly) fat, is inflammatory in itself, producing inflammatory cytokines. Adding sugar on top of this existing inflammation compounds the problem. Genetic factors: Certain genetic variations (single nucleotide polymorphisms or SNPs) affect how strongly people respond to dietary sugar. Some people have gene variants in inflammatory pathways that make them more susceptible to sugar’s pro-inflammatory effects. Genes affecting insulin signaling, glucose metabolism, and inflammation explain why some people develop diabetes or heart disease from sugar more readily than others. People with certain gut microbiome compositions: Your gut bacteria influence how you process sugar and respond to it inflammatorily. Some people have gut bacterial profiles that amplify sugar’s harmful effects. Dysbiosis (unhealthy bacterial balance) worsens inflammation from sugar. Those with existing inflammatory conditions: People with autoimmune diseases, arthritis, inflammatory bowel disease, or other inflammatory conditions are starting from a higher baseline of inflammation, and sugar further exacerbates it. Many report dramatic symptom worsening from sugar consumption and relief from elimination. Older adults: Age-related “inflammaging” (increased baseline inflammation with age) makes older people more vulnerable to additional inflammatory insults from sugar. Metabolic flexibility declines with age, affecting sugar processing. People under chronic stress: Stress activates inflammatory pathways, and adding sugar creates compounding effects. Those with poor sleep: Sleep deprivation increases inflammation, making sugar’s effects worse. Those with genetic protections: Interestingly, some people seem more resistant to sugar’s harmful effects due to favorable genetic variants, though these individuals are relatively rare. The practical message: If you have any risk factors (overweight, diabetes, family history, existing inflammatory conditions), you’re likely more susceptible to sugar’s inflammatory effects and should be especially diligent about limiting intake. Even if you seem to “tolerate” sugar well now, that doesn’t mean it’s not causing hidden damage that will manifest later. Regardless of genetics, everyone benefits from reducing sugar—some just benefit more dramatically than others.
9. Can I reverse damage from years of high sugar consumption?
The good news is that many of the harmful effects of chronic high sugar consumption can be reversed or significantly improved, though some changes may be permanent depending on the extent and duration of damage. Here’s what can and cannot be reversed: What can be improved or reversed: Chronic inflammation: Inflammatory markers typically decrease substantially within weeks to months of reducing sugar, allowing tissues to begin healing. This is one of the fastest improvements. Insulin resistance: Often improves significantly within weeks to months of dietary changes, exercise, and weight loss. Some people can completely restore insulin sensitivity if caught before diabetes develops. Blood sugar control: High blood sugar normalizes relatively quickly (days to weeks) when sugar intake decreases, though restoring perfect glucose metabolism may take longer. Weight and body composition: Reducing sugar often leads to weight loss, which itself reduces inflammation. Excess fat can be lost with time and effort. Fatty liver disease: Non-alcoholic fatty liver disease (NAFLD) from fructose overconsumption can improve and even resolve completely with sugar reduction and weight loss. Cardiovascular markers: Blood pressure, cholesterol, and triglycerides often improve within weeks to months. Gut health: Microbiome composition can shift back toward healthy bacterial balance within weeks to months of dietary changes. Energy and mood: Mental clarity, stable energy, and improved mood often occur within days to weeks. AGE accumulation: Advanced glycation end products that have accumulated in tissues slowly turn over as proteins are replaced—this happens over months to years. Some reduction occurs, though complete elimination of years of accumulation takes time. What may be permanent or harder to reverse: Established diabetes: Type 2 diabetes can sometimes be reversed with dramatic lifestyle changes including sugar elimination, but this becomes harder the longer you’ve had diabetes and the more beta cell damage has occurred. Some people can achieve remission; others can improve but not fully reverse their condition. Cardiovascular damage: Plaque buildup in arteries from years of inflammation and high blood sugar may be partially reversible but often remains to some degree. Nerve damage: Diabetic neuropathy (nerve damage from high blood sugar) may be permanent if extensive. Kidney damage: Advanced kidney disease from diabetes is generally not reversible, though progression can be halted. Cognitive decline: If Alzheimer’s or dementia has already developed, reversal is unlikely, though progression may be slowed. The timeline: Initial improvements (energy, mood, reduced cravings) within days to weeks. Metabolic improvements (blood sugar, insulin, inflammation markers) within weeks to months. Weight loss and body composition changes over months. Tissue healing and cellular repair over months to years. Some long-term damage may be permanent but further progression can be prevented. The critical message: It’s never too late to benefit from reducing sugar. Even if some damage is permanent, stopping further damage and allowing partial healing still dramatically improves health outcomes and quality of life. The earlier you make changes, the more complete the reversal can be. If you’ve consumed high sugar for years, don’t despair—your body has remarkable healing capacity when given the chance. Start today, be consistent, and improvements will come.
10. Besides reducing sugar, what else can I do to lower inflammation?
Reducing sugar is crucial, but it’s most effective when combined with other anti-inflammatory strategies. Here’s a comprehensive approach to lowering inflammation: Diet beyond sugar reduction: Increase omega-3 fatty acids from fatty fish (salmon, sardines, mackerel), walnuts, flax seeds, and chia seeds—omega-3s are powerfully anti-inflammatory. Reduce omega-6 fatty acids from vegetable oils (corn, soybean, safflower oils), which can promote inflammation when consumed in excess. Use olive oil as your primary fat source. Eat abundant colorful vegetables—aim for 5-9 servings daily. The diverse phytonutrients fight inflammation. Include anti-inflammatory spices daily: turmeric (curcumin), ginger, cinnamon, rosemary, oregano. Drink green tea (2-4 cups daily) for anti-inflammatory polyphenols. Eat berries daily for anthocyanins and other anti-inflammatory compounds. Choose whole grains over refined grains for fiber and nutrients. Limit red and processed meats, which can increase inflammation. Avoid trans fats completely (in some processed foods, margarine, shortening). Minimize processed foods in general—they often contain multiple pro-inflammatory ingredients. Exercise regularly: Both aerobic exercise and strength training reduce inflammatory markers. Aim for 150 minutes of moderate activity or 75 minutes of vigorous activity weekly, plus 2-3 strength sessions. Exercise reduces visceral fat, improves insulin sensitivity, and directly produces anti-inflammatory molecules. Don’t overdo it—excessive training without adequate recovery can temporarily increase inflammation. Optimize sleep: Poor sleep dramatically increases inflammation. Aim for 7-9 hours of quality sleep nightly. Maintain consistent sleep schedule. Address sleep apnea if present—it’s highly inflammatory. Create dark, cool, quiet sleep environment. Manage stress effectively: Chronic stress activates inflammatory pathways. Practice daily stress reduction: meditation, yoga, deep breathing, tai chi, or other mind-body practices. Consider therapy or counseling for chronic stress, anxiety, or depression. Spend time in nature—proven to reduce stress and inflammation. Cultivate social connections and community. Maintain healthy weight: Excess body fat, especially visceral fat, produces inflammatory cytokines. Even 5-10% weight loss significantly reduces inflammation. Weight loss through healthy diet and exercise provides compounding anti-inflammatory benefits. Don’t smoke and limit alcohol: Smoking is massively pro-inflammatory—quitting provides tremendous benefits. Excessive alcohol increases inflammation—if you drink, limit to moderate amounts (one drink daily for women, two for men). Dental health: Periodontal (gum) disease is a source of chronic inflammation that affects whole-body health. Brush, floss, and get regular dental cleanings. Consider targeted supplements (with medical guidance): Omega-3 fish oil, curcumin (turmeric extract), vitamin D (if deficient), probiotics for gut health, and high-quality multivitamin to fill nutritional gaps. Stay hydrated: Adequate water intake supports all cellular functions, including inflammation regulation. Minimize environmental toxins: Reduce exposure to air pollution, chemicals in personal care products, and pesticides when possible. The synergistic effect: Each of these strategies provides benefits, but combining them creates powerful synergistic effects. Reducing sugar while eating anti-inflammatory foods, exercising, sleeping well, and managing stress produces far greater inflammation reduction than any single intervention. Start with the changes that feel most achievable, then gradually add others. Even small improvements in multiple areas add up to significant health benefits. Remember that inflammation reduction is a marathon, not a sprint—consistency over time matters most.